from bpy import data, ops
cube = data.objects['Cube']
cube.select = True
ops.object.delete()
Aug 7, 2015
Script for Deleting object in Blender
To delete 'Cube' object:

Jul 29, 2015
Blender 3
1. What are three basic transformations of an object?
Changing location (grab in Blender), size (scale in Blender), and rotation (rotate in Blender).
2. Where can we find the numerical values for these quantities?
Selecting the object and bringing up the Properties region with the N hotkey. The three values are at the top, and may be changed.
3. What are the hotkeys for grab, scale and rotate?
They are G, S and R.
4. When are Global and Local angles the same?
When the object has not been rotated.
5. How can you use the 3D Manipulator?
By clicking on the colored lines on selected object.
6. How can you switch manipulator modes?
By clicking on the blue arc icon on header to activate Rotation manipulator mode, and by clicking on the button with the icon of a line connecting to the corner of a square to activate the Scale mode.
7. What hotkey sequence rotates selected object 30 degrees in global z?
It is R, Z, 30 and Enter.
8. What is the hotkey for changing level?
The M hotkey, and a numeric for the level.
Changing location (grab in Blender), size (scale in Blender), and rotation (rotate in Blender).
2. Where can we find the numerical values for these quantities?
Selecting the object and bringing up the Properties region with the N hotkey. The three values are at the top, and may be changed.
3. What are the hotkeys for grab, scale and rotate?
They are G, S and R.
4. When are Global and Local angles the same?
When the object has not been rotated.
5. How can you use the 3D Manipulator?
By clicking on the colored lines on selected object.
6. How can you switch manipulator modes?
By clicking on the blue arc icon on header to activate Rotation manipulator mode, and by clicking on the button with the icon of a line connecting to the corner of a square to activate the Scale mode.
7. What hotkey sequence rotates selected object 30 degrees in global z?
It is R, Z, 30 and Enter.
8. What is the hotkey for changing level?
The M hotkey, and a numeric for the level.
Blender 2
1. Where can you change editor type?
By left-clicking the button on the far left of the editor's header.
2. What does the 3D View editor show?
The three-dimensional view of your model or scene.
3. What does the Outliner editor show?
A hierarchical view of all the objects in your scene.
4. What does the Info header show?
The main menu and information about scene.
5. What are the animation Editors?
Timeline, Graph Editor, Dope Sheet and NLA Editor.
6. What does the Timeline editor offer?
A convenient way to quickly jump from one moment in your animation to another as well as play back the animation.
7. What does the Graph Editor show?
A graphical representation of animatable attributes in your scene as they change over time.
8. What is the Dope Sheet used for?
Creating and adjusting animation using actions or keying sets.
9. What do keying sets allow for?
Ability to group together a bunch of different animatable attributes.
10. What does the NLA Editor allow for?
Mix pre-animated actions on a single character.
11. What is the UV/Image Editor used mostly for?
Loading textures and adjusting UV coordinates.
12. What does the Video Sequence Editor (VSE) allow for?
Editing video, such as stringing a sequence of scenes together.
13. What is the Logic Editor?
A game engine integrated with Blender.
14. How is the Properties editor organized?
In subsections.
15. What does the Render subsection allow for?
Setting attributes for the final output.
16. What does the Scene subsection allow for?
The active camera, units of measurement, and the strength of gravity if you're using simulated physics.
17. What does the Word subsection control?
The environment that your scene is built in.
18. What does the Object subsection offer?
Make changes that affect an object as it relates to the scene.
19. Name an area where Object Constraints subsection is important?
Animation.
20. Why would you want to use Modifiers subsection?
To simplify design, such as working on only one side and letting the Mirror do the other side.
21. How can you restore Blender's default settings?
By selecting Load Factory Settings from the File menu.
22. What are default screen presets?
3D View Full, Animation, Compositing, Default, Game Logic, Motion Tracking, Scripting, UV Editing, and Video Editing.
23. Which hotkeys can you use to cycle through the screens?
By pressing Ctrl and either left or right arrow.
24. What is orbiting?
Rotating the 3D world around a fixed point in space.
25. How do you orbit?
Middle-click anywhere in the 3D View and drag your mouse cursor around.
26. What is panning?
Same angle view but translated in space.
27. How is panning achieved?
By holding Shift while middle-clicking and dragging your mouse cursor in the 3D View.
28. What is zooming?
Moving the view closer or farther.
29. How can zooming be achieved?
Using the mouse's scroll wheel or using + and - on Numpad.
30. What is the orthographic view of a 3D scene?
A view where grid scale is same regardless of distance from the observer and parallel lines stay the same distance apart.
31. What is the perspective view of a 3D scene?
A view where grid scale decreases with distance from the observer and parallel lines seem to touch.
32. How can we toggle between perspective and orthographic view?
Using 5 on the Numpad. It is also possible to use the View menu in 3D View's header.
33. What is the Top view?
A view down the z-axis (-z). The x-axis increases going right and y-axis increases going up.
34. What hotkey brings the top view?
Numpad 7.
35. What is the Front view?
Looking in the y direction (+y). x increases rightwards and z increases upwards.
36. What hotkey brings the front view?
Numpad 1.
37. What is the Right view?
Looking down the x direction (-x). y increases rightwards and z increases upwards.
38. What hotkey brings the right view?
Numpad 1.
39. What are hotkeys for the opposite view from Top, Front, and Right (that is Bottom, Back and Left)?
Pressing Ctrl while pressing Numpad 1, 3 or 7.
40. Which viewport shading is the default?
Solid is the default viewport shading type that Blender starts with.
41. How can you toggle to Wireframe shading?
Pressing Z toggles between Solid and Wireframe.
42. What is the Quad View?
A 3D View is split into four regions: top, front, and right orthographic views, along with a user perspective view.
43. How can you toggle into the Quad view?
Using the hotkey Ctrl+Alt+Q, or the View menu option with that name.
44. What hotkey can you use to toggle into the Properties region?
Pressing N.
45. What hotkey can you use to toggle into the Tool Shelf region?
Pressing T.
46. What hotkey brings the integrated search?
Spacebar.
By left-clicking the button on the far left of the editor's header.
2. What does the 3D View editor show?
The three-dimensional view of your model or scene.
3. What does the Outliner editor show?
A hierarchical view of all the objects in your scene.
4. What does the Info header show?
The main menu and information about scene.
5. What are the animation Editors?
Timeline, Graph Editor, Dope Sheet and NLA Editor.
6. What does the Timeline editor offer?
A convenient way to quickly jump from one moment in your animation to another as well as play back the animation.
7. What does the Graph Editor show?
A graphical representation of animatable attributes in your scene as they change over time.
8. What is the Dope Sheet used for?
Creating and adjusting animation using actions or keying sets.
9. What do keying sets allow for?
Ability to group together a bunch of different animatable attributes.
10. What does the NLA Editor allow for?
Mix pre-animated actions on a single character.
11. What is the UV/Image Editor used mostly for?
Loading textures and adjusting UV coordinates.
12. What does the Video Sequence Editor (VSE) allow for?
Editing video, such as stringing a sequence of scenes together.
13. What is the Logic Editor?
A game engine integrated with Blender.
14. How is the Properties editor organized?
In subsections.
15. What does the Render subsection allow for?
Setting attributes for the final output.
16. What does the Scene subsection allow for?
The active camera, units of measurement, and the strength of gravity if you're using simulated physics.
17. What does the Word subsection control?
The environment that your scene is built in.
18. What does the Object subsection offer?
Make changes that affect an object as it relates to the scene.
19. Name an area where Object Constraints subsection is important?
Animation.
20. Why would you want to use Modifiers subsection?
To simplify design, such as working on only one side and letting the Mirror do the other side.
21. How can you restore Blender's default settings?
By selecting Load Factory Settings from the File menu.
22. What are default screen presets?
3D View Full, Animation, Compositing, Default, Game Logic, Motion Tracking, Scripting, UV Editing, and Video Editing.
23. Which hotkeys can you use to cycle through the screens?
By pressing Ctrl and either left or right arrow.
24. What is orbiting?
Rotating the 3D world around a fixed point in space.
25. How do you orbit?
Middle-click anywhere in the 3D View and drag your mouse cursor around.
26. What is panning?
Same angle view but translated in space.
27. How is panning achieved?
By holding Shift while middle-clicking and dragging your mouse cursor in the 3D View.
28. What is zooming?
Moving the view closer or farther.
29. How can zooming be achieved?
Using the mouse's scroll wheel or using + and - on Numpad.
30. What is the orthographic view of a 3D scene?
A view where grid scale is same regardless of distance from the observer and parallel lines stay the same distance apart.
31. What is the perspective view of a 3D scene?
A view where grid scale decreases with distance from the observer and parallel lines seem to touch.
32. How can we toggle between perspective and orthographic view?
Using 5 on the Numpad. It is also possible to use the View menu in 3D View's header.
33. What is the Top view?
A view down the z-axis (-z). The x-axis increases going right and y-axis increases going up.
34. What hotkey brings the top view?
Numpad 7.
35. What is the Front view?
Looking in the y direction (+y). x increases rightwards and z increases upwards.
36. What hotkey brings the front view?
Numpad 1.
37. What is the Right view?
Looking down the x direction (-x). y increases rightwards and z increases upwards.
38. What hotkey brings the right view?
Numpad 1.
39. What are hotkeys for the opposite view from Top, Front, and Right (that is Bottom, Back and Left)?
Pressing Ctrl while pressing Numpad 1, 3 or 7.
40. Which viewport shading is the default?
Solid is the default viewport shading type that Blender starts with.
41. How can you toggle to Wireframe shading?
Pressing Z toggles between Solid and Wireframe.
42. What is the Quad View?
A 3D View is split into four regions: top, front, and right orthographic views, along with a user perspective view.
43. How can you toggle into the Quad view?
Using the hotkey Ctrl+Alt+Q, or the View menu option with that name.
44. What hotkey can you use to toggle into the Properties region?
Pressing N.
45. What hotkey can you use to toggle into the Tool Shelf region?
Pressing T.
46. What hotkey brings the integrated search?
Spacebar.
Blender 1
1. What is Blender?
Blender is a free and open source 3D modelling and animation suite.
2. How did Blender originate?
As an internal production tool for an award-winning Dutch animation company called NeoGeo.
3. When did NaN close?
In 2002.
4. How much did the 'Free Blender' campaign need to raise before releasing the source code of Blender from NaN to Blender foundation?
100 thousand euros.
5. What is a Blender window composed of?
Editors.
6. What is the most important editor?
The 3D View.
7. Where are headers found?
At either the top or bottom of editor.
8. What is a header composed of?
Menus and buttons.
9. What is the design philosophy of Blender?
To be non-blocking and non-modal.
10. What does non-blocking mean?
Different editors can not overlap.
11. What does non-modal mean?
An editor doesn't restrict you from using another editor.
12. Name a case when the non-blocking and non-modal philosophy is violated?
If you select Open from File menu, the File Browser editor is opened, over other editors.
13. Which editors are in Blender's Default scene?
Info, 3D View, Timeline, Outline and Properties.
14. What are corner widgets?
These are the diagonal lines at lower-left and at the upper-right of an editor.
15. Why are corner widgets important?
You can drag the corner widgets to either split an area, or join two areas.
16. How can you maximize area for an editor?
By pressing Shift and Spacebar, or Toggle Full Screen from View menu in the header.
Blender is a free and open source 3D modelling and animation suite.
2. How did Blender originate?
As an internal production tool for an award-winning Dutch animation company called NeoGeo.
3. When did NaN close?
In 2002.
4. How much did the 'Free Blender' campaign need to raise before releasing the source code of Blender from NaN to Blender foundation?
100 thousand euros.
5. What is a Blender window composed of?
Editors.
6. What is the most important editor?
The 3D View.
7. Where are headers found?
At either the top or bottom of editor.
8. What is a header composed of?
Menus and buttons.
9. What is the design philosophy of Blender?
To be non-blocking and non-modal.
10. What does non-blocking mean?
Different editors can not overlap.
11. What does non-modal mean?
An editor doesn't restrict you from using another editor.
12. Name a case when the non-blocking and non-modal philosophy is violated?
If you select Open from File menu, the File Browser editor is opened, over other editors.
13. Which editors are in Blender's Default scene?
Info, 3D View, Timeline, Outline and Properties.
14. What are corner widgets?
These are the diagonal lines at lower-left and at the upper-right of an editor.
15. Why are corner widgets important?
You can drag the corner widgets to either split an area, or join two areas.
16. How can you maximize area for an editor?
By pressing Shift and Spacebar, or Toggle Full Screen from View menu in the header.
Sep 20, 2014
51. RigidBodyControl
RigidBodyControl can either be static or dynamic, depending on mass.
The camera is moved and rotated, so it as y = 20, pointing to origin.
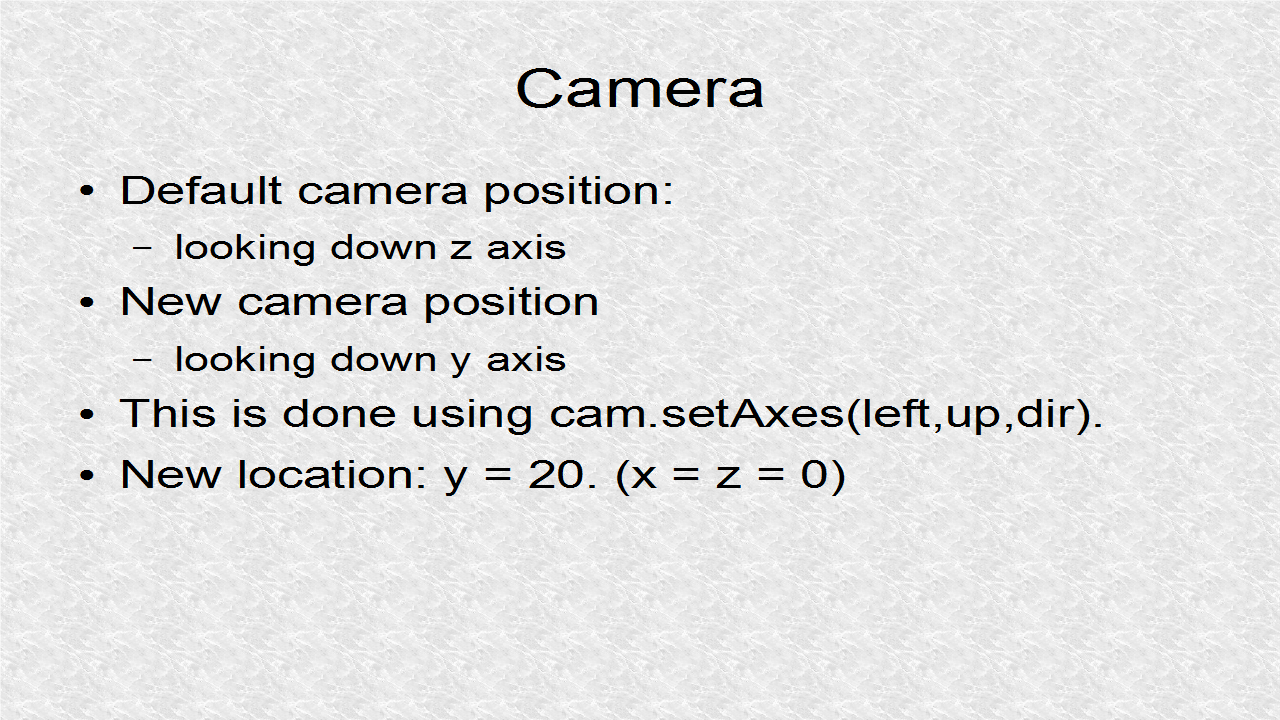
        // *** 1. Start (Camera +y looking down y)
        cam.setAxes(new Vector3f(-1,0,0), // left
                new Vector3f(0,0,-1), // up
                new Vector3f(0,-1,0));  // dir
        cam.setLocation(new Vector3f(0,20,0)); // above ground
        cam.update();
        // *** 1. End
The Application has to use BulletAppState object to enable physics.
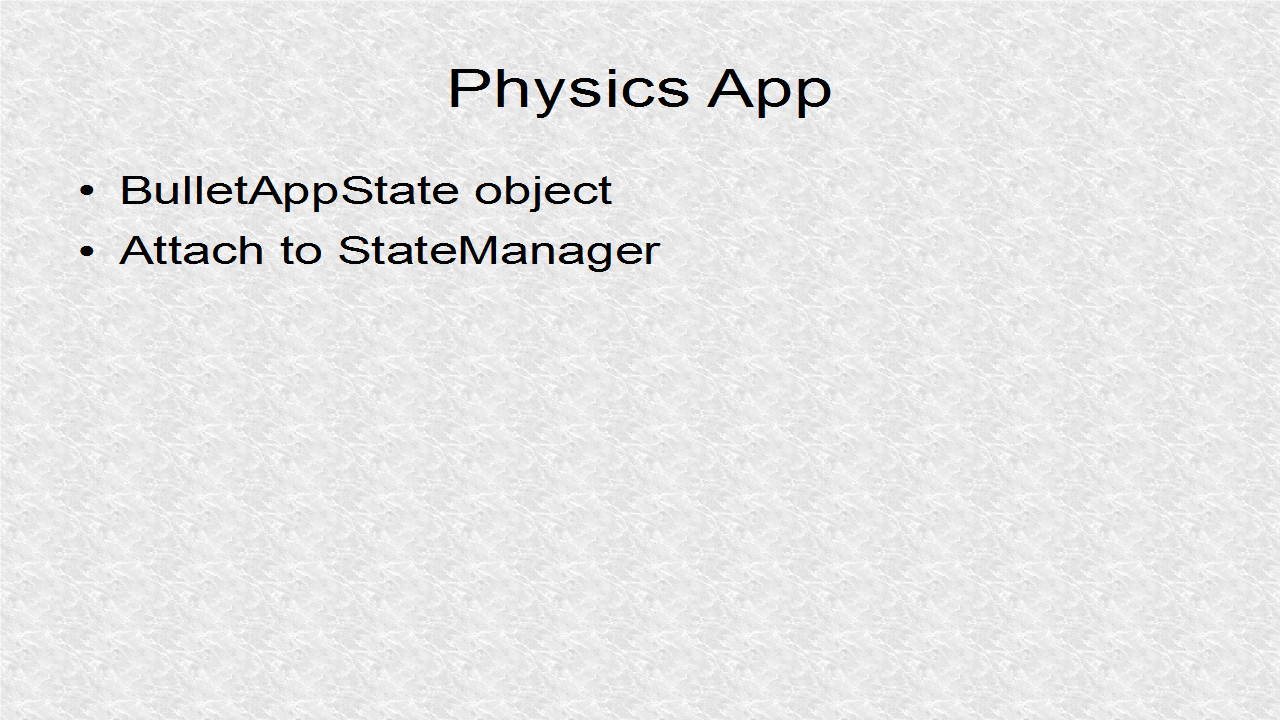
        // *** 2. Start (Set Physics)
        bulletAppState = new BulletAppState();
        stateManager.attach(bulletAppState);
        // *** 2. End
The floor is a static Box mesh object.
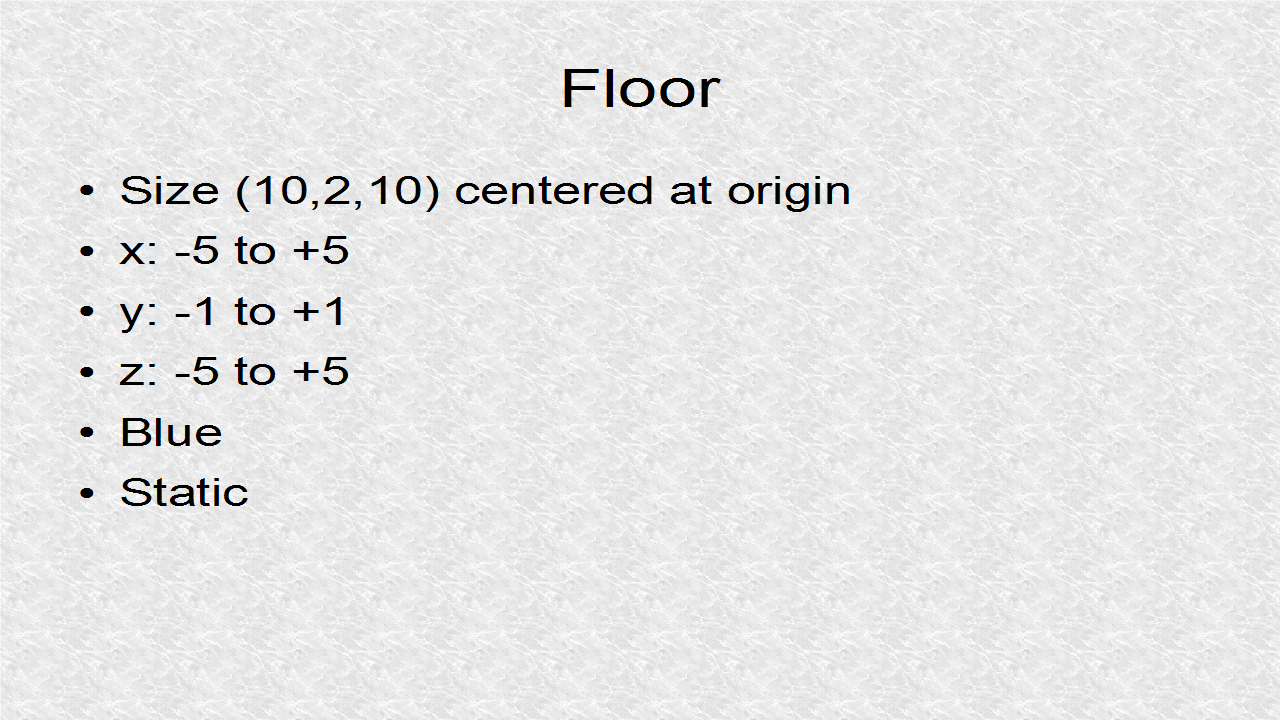
        // *** 3. Start (Floor)
        Box bFloor = new Box(5, 1, 5);
        Geometry geomFloor = new Geometry("Floor", bFloor);
        Material matFloor = new Material(assetManager,
                "Common/MatDefs/Misc/Unshaded.j3md");
        matFloor.setColor("Color", ColorRGBA.Blue);
        geomFloor.setMaterial(matFloor);
        rootNode.attachChild(geomFloor);
        RigidBodyControl floorPhy = new RigidBodyControl(0.0f);
        geomFloor.addControl(floorPhy);
        bulletAppState.getPhysicsSpace().add(floorPhy);
        // *** 3. End
The North Wall is also a static Box mesh object.
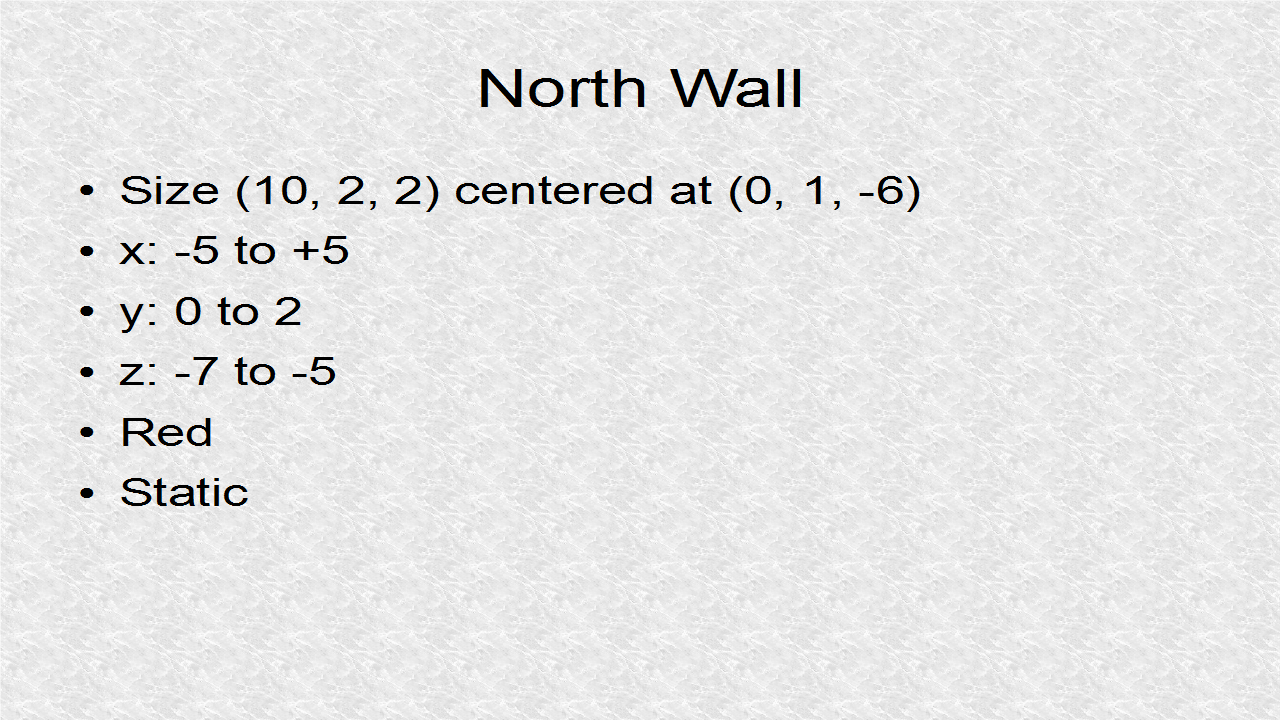
        // *** 4. Start (North Wall)
        Box bWallN = new Box(5, 1, 1);
        Geometry geomWallN = new Geometry("WallN", bWallN);
        Material matWallN = new Material(assetManager,
                "Common/MatDefs/Misc/Unshaded.j3md");
        matWallN.setColor("Color", ColorRGBA.Red);
        geomWallN.setLocalTranslation(0, 1, -6);
        geomWallN.setMaterial(matWallN);
        rootNode.attachChild(geomWallN);
        RigidBodyControl wallNPhy = new RigidBodyControl(0.0f);
        geomWallN.addControl(wallNPhy);
        bulletAppState.getPhysicsSpace().add(wallNPhy);
        // *** 4. End
The South Wall is also a static Box mesh object.
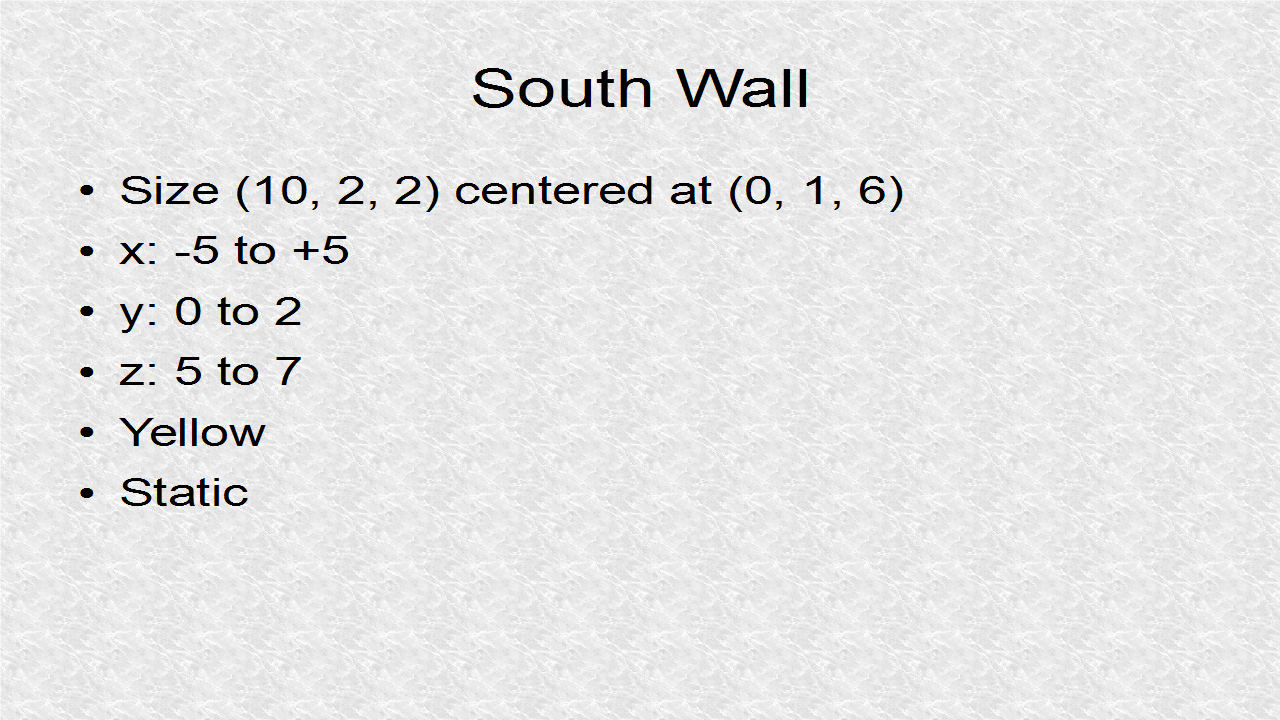
        // *** 5. Start (South Wall)
        Box bWallS = new Box(5, 1, 1);
        Geometry geomWallS = new Geometry("WallS", bWallS);
        Material matWallS = new Material(assetManager,
                "Common/MatDefs/Misc/Unshaded.j3md");
        matWallS.setColor("Color", ColorRGBA.Yellow);
        geomWallS.setLocalTranslation(0, 1, 6);
        geomWallS.setMaterial(matWallS);
        rootNode.attachChild(geomWallS);
        RigidBodyControl wallSPhy = new RigidBodyControl(0.0f);
        geomWallS.addControl(wallSPhy);
        bulletAppState.getPhysicsSpace().add(wallSPhy);
        // *** 5. End
The Worth Wall is also a static Box mesh object.
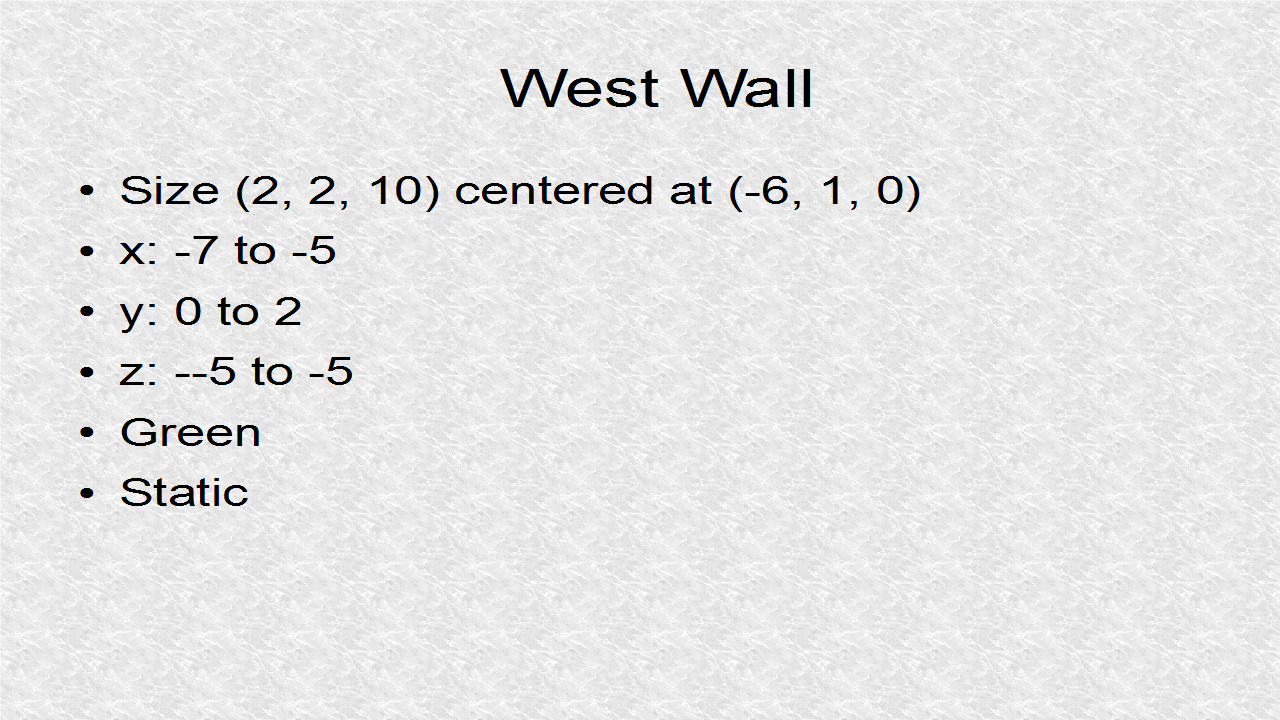
        // *** 6. Start (West Wall)
        Box bWallW = new Box(1, 1, 5);
        Geometry geomWallW = new Geometry("WallW", bWallW);
        Material matWallW = new Material(assetManager,
                "Common/MatDefs/Misc/Unshaded.j3md");
        matWallW.setColor("Color", ColorRGBA.Green);
        geomWallW.setLocalTranslation(-6, 1, 0);
        geomWallW.setMaterial(matWallW);
        rootNode.attachChild(geomWallW);
        RigidBodyControl wallWPhy = new RigidBodyControl(0.0f);
        geomWallW.addControl(wallWPhy);
        bulletAppState.getPhysicsSpace().add(wallWPhy);
        // *** 6. End
Finally, the East Wall is also a static Box mesh object.
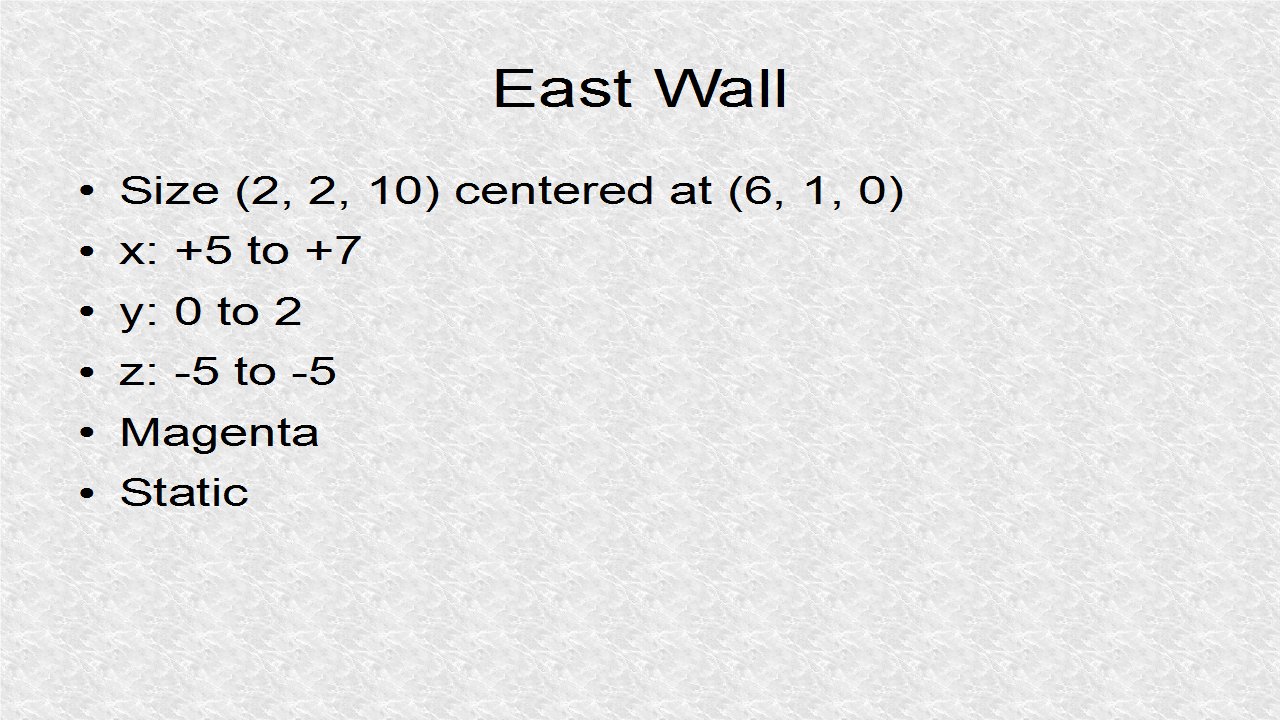
        // *** 7. Start (East Wall)
        Box bWallE = new Box(1, 1, 5);
        Geometry geomWallE = new Geometry("WallE", bWallE);
        Material matWallE = new Material(assetManager,
                "Common/MatDefs/Misc/Unshaded.j3md");
        matWallE.setColor("Color", ColorRGBA.Magenta);
        geomWallE.setLocalTranslation(6, 1, 0);
        geomWallE.setMaterial(matWallE);
        rootNode.attachChild(geomWallE);
        RigidBodyControl wallEPhy = new RigidBodyControl(0.0f);
        geomWallE.addControl(wallEPhy);
        bulletAppState.getPhysicsSpace().add(wallEPhy);
        // *** 7. End
ball1 is a Sphere mesh object and is a BetterCharacterControl object.
        // *** 8. Start (ball1 - Player)
        Sphere ball1 = new Sphere (16,16,0.5f);
        geomBall1 = new Geometry("ball1", ball1);
        Material matBall1 = new Material(assetManager,
                "Common/MatDefs/Misc/Unshaded.j3md");
        matBall1.setColor("Color", ColorRGBA.Cyan);
        geomBall1.setLocalTranslation(0, 2, 0);
        geomBall1.setMaterial(matBall1);
        rootNode.attachChild(geomBall1);
        ball1Phy = new BetterCharacterControl(0.5f,5f,30f);
        geomBall1.addControl(ball1Phy);
        bulletAppState.getPhysicsSpace().add(ball1Phy);
        // *** 8. End
ball2 is a Sphere mesh object. It is RigidBodyControl with nonzero mass.
        // *** 9. Start (ball2 - Can move)
        Sphere ball2 = new Sphere (16,16,0.5f);
        Geometry geomBall2 = new Geometry("ball2", ball2);
        Material matBall2 = new Material(assetManager,
                "Common/MatDefs/Misc/Unshaded.j3md");
        matBall2.setColor("Color", ColorRGBA.Orange);
        geomBall2.setLocalTranslation(2, 2, 1.5f);
        geomBall2.setMaterial(matBall2);
        rootNode.attachChild(geomBall2);
        RigidBodyControl ball2Phy = new RigidBodyControl(1);
        geomBall2.addControl(ball2Phy);
        bulletAppState.getPhysicsSpace().add(ball2Phy);
        // *** 9. End
ball3 is a Sphere mesh object. It is RigidBodyControl with nonzero mass.
        // *** 10. Start (ball2 - Can move)
        Sphere ball3 = new Sphere (16,16,0.5f);
        Geometry geomBall3 = new Geometry("ball3", ball3);
        Material matBall3 = new Material(assetManager,
                "Common/MatDefs/Misc/Unshaded.j3md");
        matBall3.setColor("Color", ColorRGBA.Pink);
        geomBall3.setLocalTranslation(-2, 2, -1.5f);
        geomBall3.setMaterial(matBall3);
        rootNode.attachChild(geomBall3);
        RigidBodyControl ball3Phy = new RigidBodyControl(1);
        geomBall3.addControl(ball3Phy);
        bulletAppState.getPhysicsSpace().add(ball3Phy);
        // *** 10. End
// JMonkey51.java

package mygame;

import com.jme3.app.SimpleApplication;
import com.jme3.bullet.BulletAppState;
import com.jme3.bullet.control.BetterCharacterControl;
import com.jme3.bullet.control.RigidBodyControl;
import com.jme3.input.KeyInput;
import com.jme3.input.controls.ActionListener;
import com.jme3.input.controls.KeyTrigger;
import com.jme3.material.Material;
import com.jme3.math.ColorRGBA;
import com.jme3.math.Vector3f;
import com.jme3.renderer.RenderManager;
import com.jme3.scene.Geometry;
import com.jme3.scene.shape.Box;
import com.jme3.scene.shape.Sphere;

public class JMonkey51 extends SimpleApplication {
    public static void main(String[] args) {
        JMonkey51 app = new JMonkey51();
        app.start();
    }

    Geometry geomBall1; // Player Geometry
    private BulletAppState bulletAppState; // Physics
    private BetterCharacterControl ball1Phy; // Player
    private Vector3f walkDirection = new Vector3f();
    private boolean left = false,
          right = false, up = false, down = false;

    @Override
    public void simpleInitApp() {
        flyCam.setEnabled(false);
        viewPort.setBackgroundColor(ColorRGBA.LightGray);
        setDisplayFps(false);
        setDisplayStatView(false);

        // *** 1. Start (Camera +y looking down y)
        cam.setAxes(new Vector3f(-1,0,0), // left
                new Vector3f(0,0,-1), // up
                new Vector3f(0,-1,0));  // dir
        cam.setLocation(new Vector3f(0,20,0)); // above ground
        cam.update();
        // *** 1. End

        // *** 2. Start (Set Physics)
        bulletAppState = new BulletAppState();
        stateManager.attach(bulletAppState);
        // *** 2. End

        // *** 3. Start (Floor)
        Box bFloor = new Box(5, 1, 5);
        Geometry geomFloor = new Geometry("Floor", bFloor);
        Material matFloor = new Material(assetManager,
                "Common/MatDefs/Misc/Unshaded.j3md");
        matFloor.setColor("Color", ColorRGBA.Blue);
        geomFloor.setMaterial(matFloor);
        rootNode.attachChild(geomFloor);
        RigidBodyControl floorPhy = new RigidBodyControl(0.0f);
        geomFloor.addControl(floorPhy);
        bulletAppState.getPhysicsSpace().add(floorPhy);
        // *** 3. End

        // *** 4. Start (North Wall)
        Box bWallN = new Box(5, 1, 1);
        Geometry geomWallN = new Geometry("WallN", bWallN);
        Material matWallN = new Material(assetManager,
                "Common/MatDefs/Misc/Unshaded.j3md");
        matWallN.setColor("Color", ColorRGBA.Red);
        geomWallN.setLocalTranslation(0, 1, -6);
        geomWallN.setMaterial(matWallN);
        rootNode.attachChild(geomWallN);
        RigidBodyControl wallNPhy = new RigidBodyControl(0.0f);
        geomWallN.addControl(wallNPhy);
        bulletAppState.getPhysicsSpace().add(wallNPhy);
        // *** 4. End

        // *** 5. Start (South Wall)
        Box bWallS = new Box(5, 1, 1);
        Geometry geomWallS = new Geometry("WallS", bWallS);
        Material matWallS = new Material(assetManager,
                "Common/MatDefs/Misc/Unshaded.j3md");
        matWallS.setColor("Color", ColorRGBA.Yellow);
        geomWallS.setLocalTranslation(0, 1, 6);
        geomWallS.setMaterial(matWallS);
        rootNode.attachChild(geomWallS);
        RigidBodyControl wallSPhy = new RigidBodyControl(0.0f);
        geomWallS.addControl(wallSPhy);
        bulletAppState.getPhysicsSpace().add(wallSPhy);
        // *** 5. End

        // *** 6. Start (West Wall)
        Box bWallW = new Box(1, 1, 5);
        Geometry geomWallW = new Geometry("WallW", bWallW);
        Material matWallW = new Material(assetManager,
                "Common/MatDefs/Misc/Unshaded.j3md");
        matWallW.setColor("Color", ColorRGBA.Green);
        geomWallW.setLocalTranslation(-6, 1, 0);
        geomWallW.setMaterial(matWallW);
        rootNode.attachChild(geomWallW);
        RigidBodyControl wallWPhy = new RigidBodyControl(0.0f);
        geomWallW.addControl(wallWPhy);
        bulletAppState.getPhysicsSpace().add(wallWPhy);
        // *** 6. End

        // *** 7. Start (East Wall)
        Box bWallE = new Box(1, 1, 5);
        Geometry geomWallE = new Geometry("WallE", bWallE);
        Material matWallE = new Material(assetManager,
                "Common/MatDefs/Misc/Unshaded.j3md");
        matWallE.setColor("Color", ColorRGBA.Magenta);
        geomWallE.setLocalTranslation(6, 1, 0);
        geomWallE.setMaterial(matWallE);
        rootNode.attachChild(geomWallE);
        RigidBodyControl wallEPhy = new RigidBodyControl(0.0f);
        geomWallE.addControl(wallEPhy);
        bulletAppState.getPhysicsSpace().add(wallEPhy);
        // *** 7. End

        // *** 8. Start (ball1 - Player)
        Sphere ball1 = new Sphere (16,16,0.5f);
        geomBall1 = new Geometry("ball1", ball1);
        Material matBall1 = new Material(assetManager,
                "Common/MatDefs/Misc/Unshaded.j3md");
        matBall1.setColor("Color", ColorRGBA.Cyan);
        geomBall1.setLocalTranslation(0, 2, 0);
        geomBall1.setMaterial(matBall1);
        rootNode.attachChild(geomBall1);
        ball1Phy = new BetterCharacterControl(0.5f,5f,30f);
        geomBall1.addControl(ball1Phy);
        bulletAppState.getPhysicsSpace().add(ball1Phy);
        // *** 8. End

        // *** 9. Start (ball2 - Can move)
        Sphere ball2 = new Sphere (16,16,0.5f);
        Geometry geomBall2 = new Geometry("ball2", ball2);
        Material matBall2 = new Material(assetManager,
                "Common/MatDefs/Misc/Unshaded.j3md");
        matBall2.setColor("Color", ColorRGBA.Orange);
        geomBall2.setLocalTranslation(2, 2, 1.5f);
        geomBall2.setMaterial(matBall2);
        rootNode.attachChild(geomBall2);
        RigidBodyControl ball2Phy = new RigidBodyControl(1);
        geomBall2.addControl(ball2Phy);
        bulletAppState.getPhysicsSpace().add(ball2Phy);
        // *** 9. End

        // *** 10. Start (ball2 - Can move)
        Sphere ball3 = new Sphere (16,16,0.5f);
        Geometry geomBall3 = new Geometry("ball3", ball3);
        Material matBall3 = new Material(assetManager,
                "Common/MatDefs/Misc/Unshaded.j3md");
        matBall3.setColor("Color", ColorRGBA.Pink);
        geomBall3.setLocalTranslation(-2, 2, -1.5f);
        geomBall3.setMaterial(matBall3);
        rootNode.attachChild(geomBall3);
        RigidBodyControl ball3Phy = new RigidBodyControl(1);
        geomBall3.addControl(ball3Phy);
        bulletAppState.getPhysicsSpace().add(ball3Phy);
        // *** 10. End

        setupKeys();
    }

    private void setupKeys() {
        inputManager.addMapping("Left",
                new KeyTrigger(KeyInput.KEY_LEFT));
        inputManager.addMapping("Right",
                new KeyTrigger(KeyInput.KEY_RIGHT));
        inputManager.addMapping("Up",
                new KeyTrigger(KeyInput.KEY_UP));
        inputManager.addMapping("Down",
                new KeyTrigger(KeyInput.KEY_DOWN));
        inputManager.addListener(actionListener,
                "Left","Right","Up","Down");
    }

    private ActionListener actionListener = new ActionListener() {
        public void onAction(String binding, boolean isPressed, float tpf) {
            if (binding.equals("Left")) {
                left = isPressed;
            } else if (binding.equals("Right")) {
                right= isPressed;
            } else if (binding.equals("Up")) {
                up = isPressed;
            } else if (binding.equals("Down")) {
                down = isPressed;
            }
        }
    };

    @Override
    public void simpleUpdate(float tpf) {
        walkDirection.set(0, 0, 0);
        if (left) {
            walkDirection.addLocal(-10f,0,0);
        } else if (right) {
            walkDirection.addLocal(10f,0,0);
        }
        if (up) {
            walkDirection.addLocal(0,0,-10f);
        } else if (down) {
            walkDirection.addLocal(0,0,+10f);
        }
        ball1Phy.setWalkDirection(walkDirection);
    }

    @Override
    public void simpleRender(RenderManager rm) {
    }
}
Output:
Sep 14, 2014
50. Positional Audio
Positional audio changes as the player approaches or goes away from the source.

The audio source is a high blue box. This is only a visual representation and actual audio node is created later.

        // *** 1. Start (High Blue Box, Source of Sound)
        Box b = new Box(.1f, 1f, .1f);
        geomSource = new Geometry("Source", b);
        Material mat = new Material(assetManager,
                "Common/MatDefs/Misc/Unshaded.j3md");
        mat.setColor("Color", ColorRGBA.Blue);
        geomSource.setMaterial(mat);
        geomSource.setLocalTranslation(new Vector3f(-1.5f,0,0));
        rootNode.attachChild(geomSource);
        // *** 1. End
The player is oval shaped with arrow controls, defined next.

        // *** 2. Start (Listener is Red oval shaped)
        Sphere sphere = new Sphere(16,16,.1f);
        geomListener = new Geometry("Listener",sphere);
        Material mat1 = new Material(assetManager,
                "Common/MatDefs/Misc/Unshaded.j3md");
        mat1.setColor("Color", ColorRGBA.Red);
        geomListener.setMaterial(mat1);
        geomListener.setLocalTranslation(3,0,0);
        geomListener.setLocalScale(new Vector3f(1,10,1));
        rootNode.attachChild(geomListener);
        // *** 2. End
The arrow keys are mapped.

        // *** 3. Start (arrows for left and right)
        inputManager.addMapping("Left", new KeyTrigger(
                KeyInput.KEY_LEFT));
        inputManager.addMapping("Right", new KeyTrigger(
                KeyInput.KEY_RIGHT));
        inputManager.addMapping("Up", new KeyTrigger(
                KeyInput.KEY_UP));
        inputManager.addMapping("Down", new KeyTrigger(
                KeyInput.KEY_DOWN));
        inputManager.addListener(analogListener,
                "Left", "Right", "Up", "Down");
        // *** 3. End
The arrow callbacks update the oval position.

        // *** 4. Start (move left or right)
        public void onAnalog(String name,
                float value, float tpf) {
            if (name.equals("Left")) {
                geomListener.move(-.01f, 0, 0);
            } else if (name.equals("Right")) {
                geomListener.move(.01f, 0, 0);
            } else if (name.equals("Up")) {
                geomListener.move(0, .01f, 0);
            } else if (name.equals("Down")) {
                geomListener.move(0, -.01f, 0);
            }
        }
        // *** 4. End
The audio is set as positional, loaded into memory (should be small audio samples), otherwise we should stream. We should set RefDistance and MaxDistance. For ambient background audio, etc. we will not set is as positional or give the two distance values.

        // *** 5. Start (Positional Audio)
        bark = new AudioNode(assetManager,
                "Sounds/Dog/bark.wav");
        bark.setPositional(true);
        bark.setRefDistance(.03f);  // 50% volume distance
        bark.setMaxDistance(3f);    // Steady volume distance
        bark.setVolume(2);          // Initial volume
        bark.setLooping(true);      // continuous
        bark.setLocalTranslation(
                geomSource.getLocalTranslation());
        rootNode.attachChild(bark);
        bark.play();
        // *** 5. End
For positional audio, the listener position must be updated.

        // *** 6. Start (status + new audio listener loc)
        // listener is protected variable of SimpleApplication
        dist = geomListener.getLocalTranslation().
                distance(geomSource.getLocalTranslation());
        System.out.println("Distance: " + dist);
        if (dist>3||dist<-3) System.out.println("--Steady");
        else System.out.println("--Changing");
        listener.setLocation(
                geomListener.getLocalTranslation());
        // *** 6. End
// JMonkey50.java

package mygame;

import com.jme3.app.SimpleApplication;
import com.jme3.audio.AudioNode;
import com.jme3.input.KeyInput;
import com.jme3.input.controls.AnalogListener;
import com.jme3.input.controls.KeyTrigger;
import com.jme3.material.Material;
import com.jme3.math.ColorRGBA;
import com.jme3.math.Vector3f;
import com.jme3.scene.Geometry;
import com.jme3.scene.shape.Box;
import com.jme3.scene.shape.Sphere;
import com.jme3.system.AppSettings;

public class JMonkey50 extends SimpleApplication {
    public static void main(String[] args) {
        AppSettings settings = new AppSettings(true);
        settings.setFrameRate(60);
        settings.setTitle("Positional Audio!");
        JMonkey50 app = new JMonkey50();
        app.setSettings(settings);
        app.start();
    }

    private AudioNode bark;
    private Geometry geomListener;
    private Geometry geomSource;

    @Override
    public void simpleInitApp() {
        viewPort.setBackgroundColor(ColorRGBA.White);
        setDisplayFps(false);
        setDisplayStatView(false);
        cam.setLocation(new Vector3f(-2,0,10)); // move camera left
        flyCam.setEnabled(false);

        // *** 1. Start (High Blue Box, Source of Sound)
        Box b = new Box(.1f, 1f, .1f);
        geomSource = new Geometry("Source", b);
        Material mat = new Material(assetManager,
                "Common/MatDefs/Misc/Unshaded.j3md");
        mat.setColor("Color", ColorRGBA.Blue);
        geomSource.setMaterial(mat);
        geomSource.setLocalTranslation(new Vector3f(-1.5f,0,0));
        rootNode.attachChild(geomSource);
        // *** 1. End

        // *** 2. Start (Listener is Red oval shaped)
        Sphere sphere = new Sphere(16,16,.1f);
        geomListener = new Geometry("Listener",sphere);
        Material mat1 = new Material(assetManager,
                "Common/MatDefs/Misc/Unshaded.j3md");
        mat1.setColor("Color", ColorRGBA.Red);
        geomListener.setMaterial(mat1);
        geomListener.setLocalTranslation(3,0,0);
        geomListener.setLocalScale(new Vector3f(1,10,1));
        rootNode.attachChild(geomListener);
        // *** 2. End

        initKeys(); // initialize 4 arrows
        initAudio(); // initialize positional audio
    }

    private void initKeys() {
        // *** 3. Start (arrows for left and right)
        inputManager.addMapping("Left", new KeyTrigger(
                KeyInput.KEY_LEFT));
        inputManager.addMapping("Right", new KeyTrigger(
                KeyInput.KEY_RIGHT));
        inputManager.addMapping("Up", new KeyTrigger(
                KeyInput.KEY_UP));
        inputManager.addMapping("Down", new KeyTrigger(
                KeyInput.KEY_DOWN));
        inputManager.addListener(analogListener,
                "Left", "Right", "Up", "Down");
        // *** 3. End
    }

    private AnalogListener analogListener =
            new AnalogListener() {
        // *** 4. Start (move left or right)
        public void onAnalog(String name,
                float value, float tpf) {
            if (name.equals("Left")) {
                geomListener.move(-.01f, 0, 0);
            } else if (name.equals("Right")) {
                geomListener.move(.01f, 0, 0);
            } else if (name.equals("Up")) {
                geomListener.move(0, .01f, 0);
            } else if (name.equals("Down")) {
                geomListener.move(0, -.01f, 0);
            }
        }
        // *** 4. End
    };


    private void initAudio() {
        // *** 5. Start (Positional Audio)
        bark = new AudioNode(assetManager,
                "Sounds/Dog/bark.wav");
        bark.setPositional(true);
        bark.setRefDistance(.03f);  // 50% volume distance
        bark.setMaxDistance(3f);    // Steady volume distance
        bark.setVolume(2);          // Initial volume
        bark.setLooping(true);      // continuous
        bark.setLocalTranslation(
                geomSource.getLocalTranslation());
        rootNode.attachChild(bark);
        bark.play();
        // *** 5. End
    }

    float dist;

    @Override
    public void simpleUpdate(float tpf) {
        // *** 6. Start (status + new audio listener loc)
        // listener is protected variable of SimpleApplication
        dist = geomListener.getLocalTranslation().
                distance(geomSource.getLocalTranslation());
        System.out.println("Distance: " + dist);
        if (dist>3||dist<-3) System.out.println("--Steady");
        else System.out.println("--Changing");
        listener.setLocation(
                geomListener.getLocalTranslation());
        // *** 6. End
    }
}
Output:
Sep 11, 2014
49. Sine terrain
A sum of sine waves, in 2D directions, will control the terrain height in the 3rd dimension, here.

The variable heightmap is a float array of size 512 by 512. The for loops are used to initialize it.

        // *** 1. Start (variables)
        final int IMG_SIZE = 512;
        float[] heightmap = new float[IMG_SIZE*IMG_SIZE];
        int i,j; // x,y
        final int NX = 400; // periods in x
        final int NY = 300; // and y
        float valx,valy; // x,y contributions
        // *** 1. End
First, we can find valx, which is the first sine contribution.

        // *** 2. Start (valx)
        for (i = 0; i<IMG_SIZE; i++) {
            valx = 127.5f*FastMath.sin(2*PI*i/NX)+127.5f;
        // *** 2. End
In the inner for loop, we find valy, which is the second sine contribution.

            // *** 3. Start (valy)
            for (j = 0; j<IMG_SIZE; j++) {
                valy = 127.5f*FastMath.sin(2*PI*j/NY)+127.5f;
            // *** 3. End
For the heightmap initialization, the 2 dimensions are mapped to 1 dimension, and a linear combination of valx and valy is used.

                // *** 4. Start (heightmap)
                heightmap[i+j*IMG_SIZE] = (0.25f*valx +
                        0.75f*valy);
                // *** 4. End
// JMonkey49.java

package mygame;

import com.jme3.app.SimpleApplication;
import com.jme3.material.Material;
import com.jme3.math.ColorRGBA;
import com.jme3.math.FastMath;
import com.jme3.math.Vector3f;
import com.jme3.renderer.RenderManager;
import com.jme3.terrain.geomipmap.TerrainQuad;
import com.jme3.texture.Texture;

public class JMonkey49 extends SimpleApplication {

    public static void main(String[] args) {
        JMonkey49 app = new JMonkey49();
        app.start();
    }

    private TerrainQuad terrain;
    Material materialTerrain;
    final float PI = FastMath.PI;

    @Override
    public void simpleInitApp() {

        viewPort.setBackgroundColor(ColorRGBA.LightGray);
        setDisplayFps(false);
        setDisplayStatView(false);
        flyCam.setMoveSpeed(50); // fast camera

        // Terrain
        materialTerrain = new Material(assetManager,
                "Common/MatDefs/Terrain/Terrain.j3md");
        materialTerrain.setTexture("Alpha", assetManager.
                loadTexture("Textures/Ex49/redgreenblue.png"));
        Texture burlwood = assetManager.loadTexture(
                "Textures/Ex49/burlwood.png");
        burlwood.setWrap(Texture.WrapMode.Repeat);
        materialTerrain.setTexture("Tex1", burlwood);
        materialTerrain.setFloat("Tex1Scale", 64);
        Texture craters = assetManager.loadTexture(
                "Textures/Ex49/craters.png");
        craters.setWrap(Texture.WrapMode.Repeat);
        materialTerrain.setTexture("Tex2", craters);
        materialTerrain.setFloat("Tex2Scale", 64);
        Texture road = assetManager.loadTexture(
                "Textures/Ex49/road.png");
        road.setWrap(Texture.WrapMode.Repeat);
        materialTerrain.setTexture("Tex3", road);
        materialTerrain.setFloat("Tex3Scale", 64);

        // *** 1. Start (variables)
        final int IMG_SIZE = 512;
        float[] heightmap = new float[IMG_SIZE*IMG_SIZE];
        int i,j; // x,y
        final int NX = 400; // periods in x
        final int NY = 300; // and y
        float valx,valy; // x,y contributions
        // *** 1. End

        // *** 2. Start (valx)
        for (i = 0; i<IMG_SIZE; i++) {
            valx = 127.5f*FastMath.sin(2*PI*i/NX)+127.5f;
        // *** 2. End

            // *** 3. Start (valy)
            for (j = 0; j<IMG_SIZE; j++) {
                valy = 127.5f*FastMath.sin(2*PI*j/NY)+127.5f;
            // *** 3. End

                // *** 4. Start (heightmap)
                heightmap[i+j*IMG_SIZE] = (0.25f*valx +
                        0.75f*valy);
                // *** 4. End
            }
        }

        terrain = new TerrainQuad("terrain",
                129, 513, // patch + 1, height size + 1
                heightmap); // float array
        terrain.setMaterial(materialTerrain);
        terrain.setLocalScale(.1f, .1f, .1f);
        float ang = 35*FastMath.DEG_TO_RAD;
        terrain.rotate(2*ang, 0, ang);
        rootNode.attachChild(terrain);
        cam.setLocation(new Vector3f(0,0,150)); // far away
    }

    @Override
    public void simpleUpdate(float tpf) {
    }

    @Override
    public void simpleRender(RenderManager rm) {
    }
}
Output:
48. Terrain
A simple stepped terrain is created.
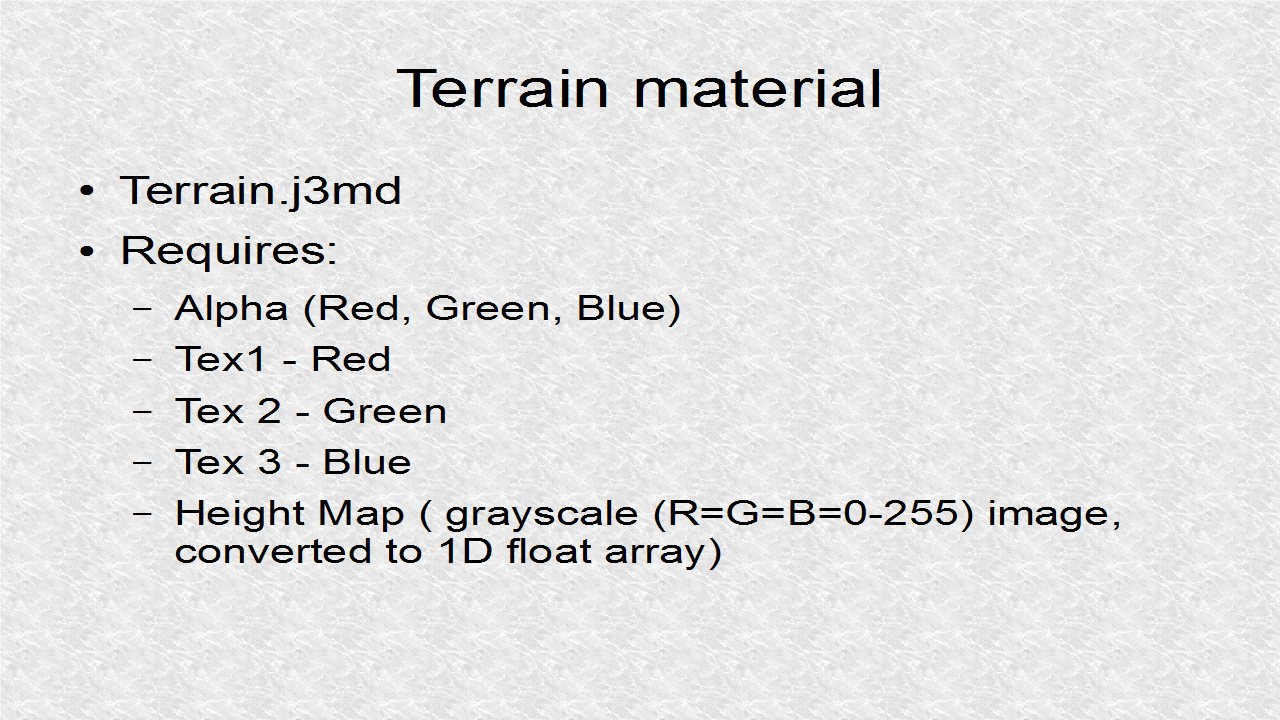
The terrain material is based on Terrain.j3md. This requires a few Image Textures. The Alpha gives weight of Red, Green, and Blue Textures. We also need a height map.
        // *** 1. Start (Terrain Unshaded material)
        materialTerrain = new Material(assetManager,
                "Common/MatDefs/Terrain/Terrain.j3md");
        // *** 1. End
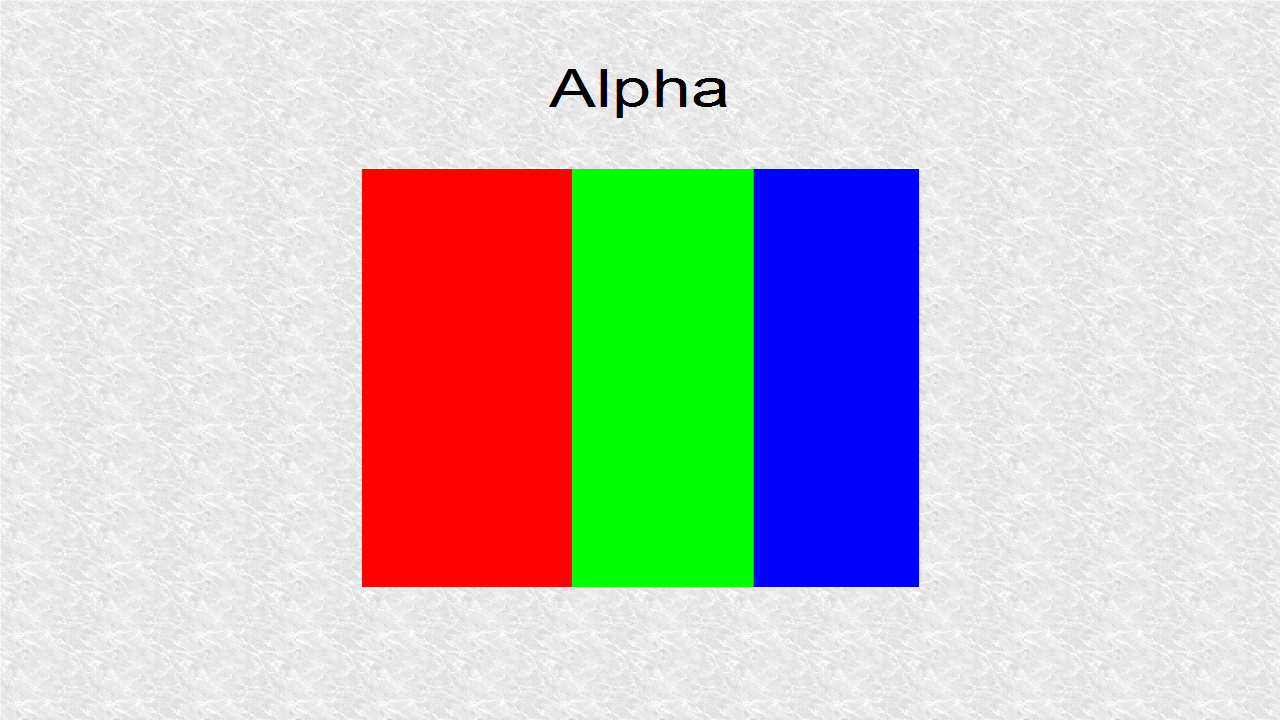
This is a simple image for Alpha. The portion of terrain devoted to the three textures is about equal.
        // *** 2. Start (Alpha Texture)
        materialTerrain.setTexture("Alpha", assetManager.
                loadTexture("Textures/Ex48/redgreenblue.png"));
        // *** 2. End
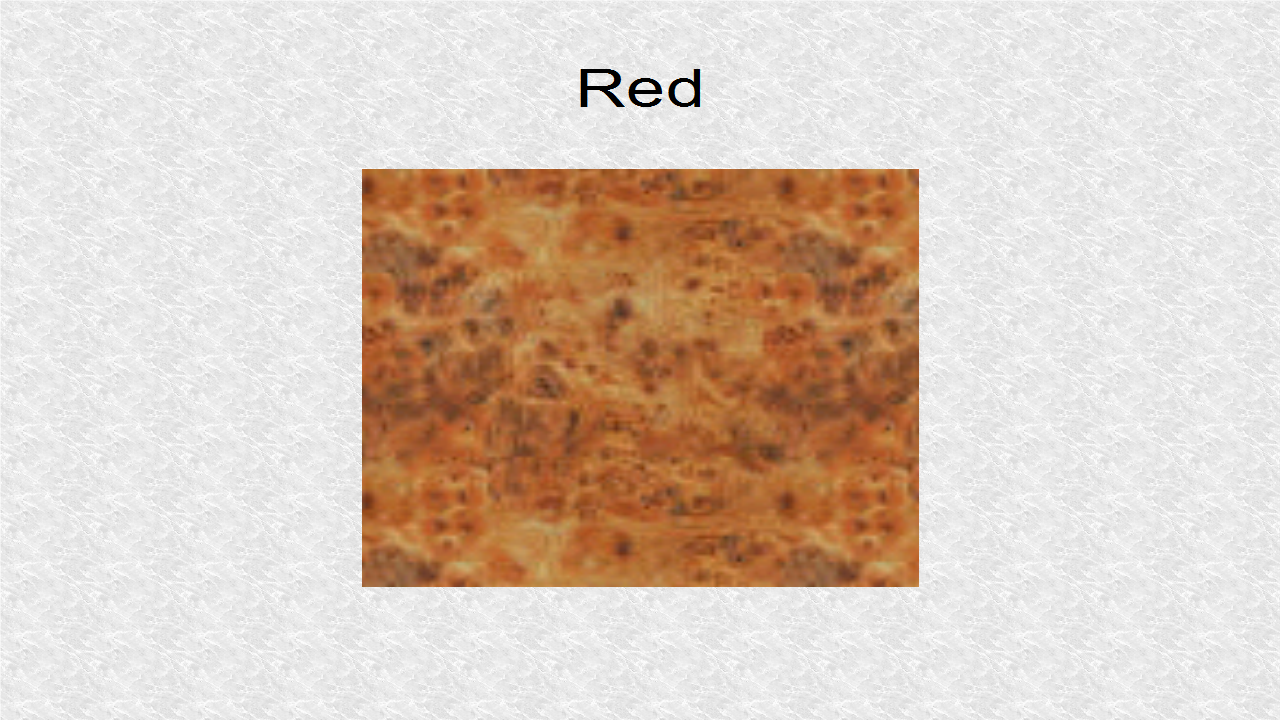
The red texture is based on this image, based on the burlwood pattern in GIMP.
        // *** 3. Start (Red Texture)
        Texture burlwood = assetManager.loadTexture(
                "Textures/Ex48/burlwood.png");
        burlwood.setWrap(Texture.WrapMode.Repeat);
        materialTerrain.setTexture("Tex1", burlwood);
        materialTerrain.setFloat("Tex1Scale", 64);
        // *** 3. End
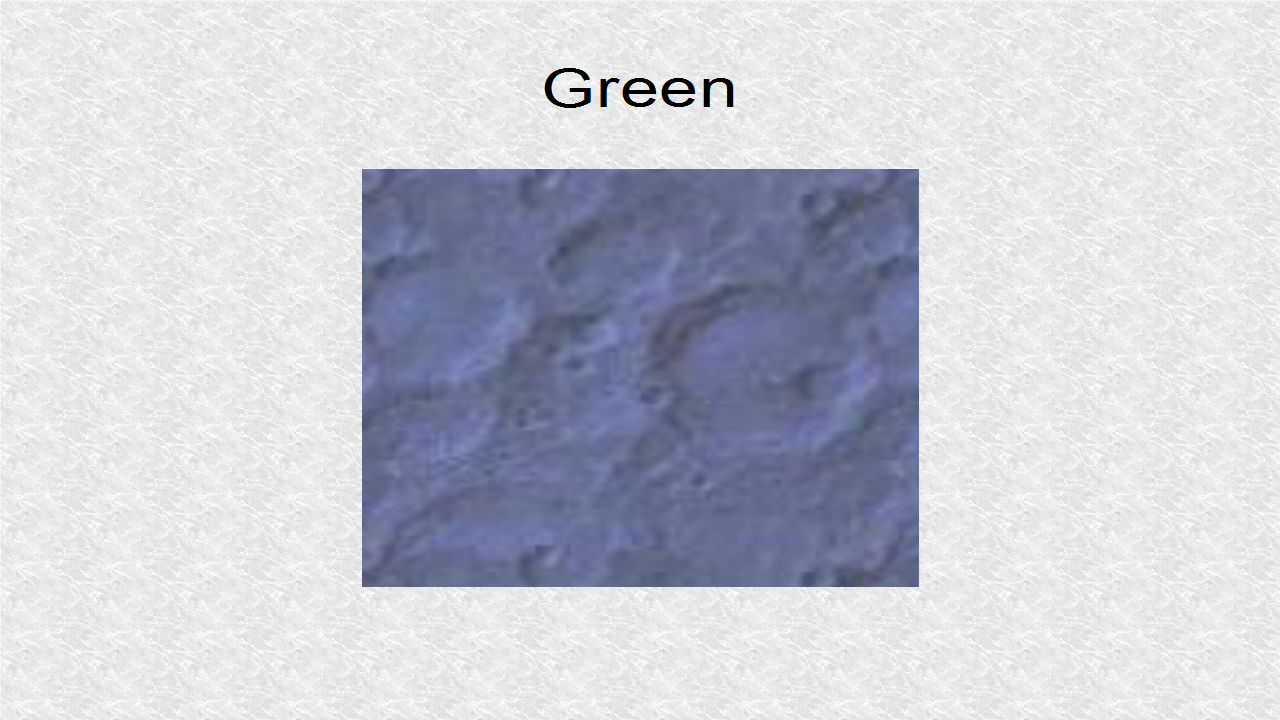
The green texture is based on this image, based on the craters pattern in GIMP.
        // *** 4. Start (Green Texture)
        Texture craters = assetManager.loadTexture(
                "Textures/Ex48/craters.png");
        craters.setWrap(Texture.WrapMode.Repeat);
        materialTerrain.setTexture("Tex2", craters);
        materialTerrain.setFloat("Tex2Scale", 64);
        // *** 4. End
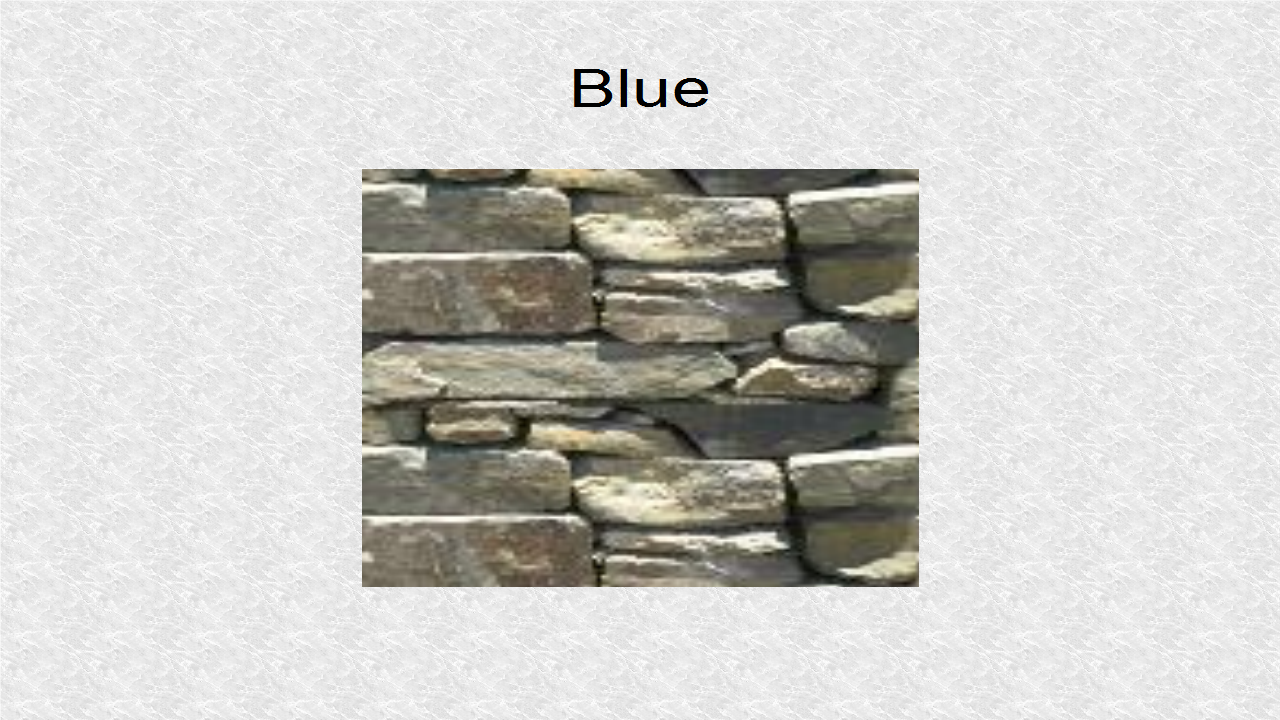
The blue texture is based on this image, based on the road pattern in GIMP.
        // *** 5. Start (Blue Texture)
        Texture road = assetManager.loadTexture(
                "Textures/Ex48/road.png");
        road.setWrap(Texture.WrapMode.Repeat);
        materialTerrain.setTexture("Tex3", road);
        materialTerrain.setFloat("Tex3Scale", 64);
        // *** 5. End
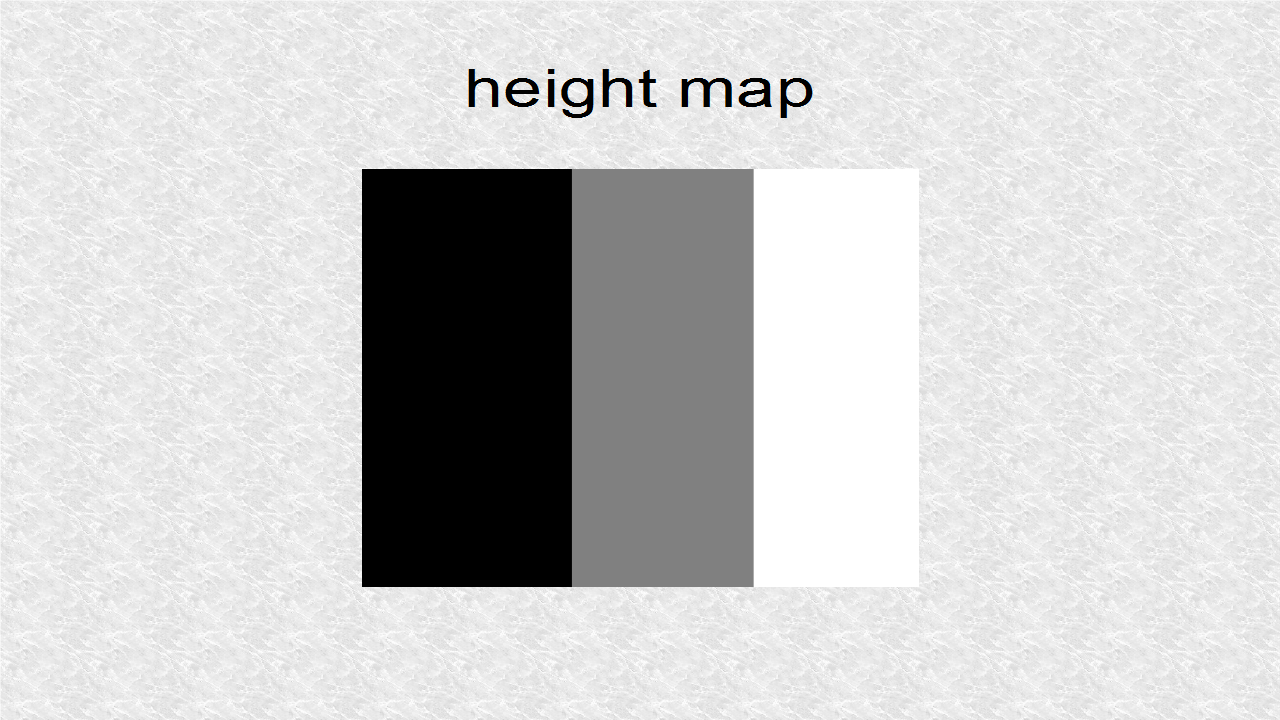
This is a gray-scale height map. The three regions corresponds to 0, 128, and 255, so the two steps are almost equal in size.
        // *** 6. Start (Height map)
        AbstractHeightMap heightmap = null;
        Texture heightMapImage = assetManager.loadTexture(
                "Textures/Ex48/heightmap.png");
        heightmap = new ImageBasedHeightMap(
                heightMapImage.getImage());
        heightmap.load();
        // *** 6. End
Finally, the terrain can be added to the rootNode.
        // *** 7. Start (terrain)
        terrain = new TerrainQuad("terrain",
                129, 513, // patch + 1, height size + 1
                heightmap.getHeightMap()); // float array
        terrain.setMaterial(materialTerrain);
        terrain.setLocalScale(.1f, .1f, .1f);
        float ang = 45*FastMath.DEG_TO_RAD;
        terrain.rotate(ang, 0, ang);
        rootNode.attachChild(terrain);
        cam.setLocation(new Vector3f(0,0,150)); // far away
        // *** 7. End
// JMonkey48.java

package mygame;

import com.jme3.app.SimpleApplication;
import com.jme3.material.Material;
import com.jme3.math.ColorRGBA;
import com.jme3.math.FastMath;
import com.jme3.math.Vector3f;
import com.jme3.renderer.RenderManager;
import com.jme3.terrain.geomipmap.TerrainQuad;
import com.jme3.terrain.heightmap.AbstractHeightMap;
import com.jme3.terrain.heightmap.ImageBasedHeightMap;
import com.jme3.texture.Texture;

public class JMonkey48 extends SimpleApplication {

    public static void main(String[] args) {
        JMonkey48 app = new JMonkey48();
        app.start();
    }

    private TerrainQuad terrain;
    Material materialTerrain;

    @Override
    public void simpleInitApp() {

        viewPort.setBackgroundColor(ColorRGBA.LightGray);
        setDisplayFps(false);
        setDisplayStatView(false);
        flyCam.setMoveSpeed(100); // faster camera

        // *** 1. Start (Terrain Unshaded material)
        materialTerrain = new Material(assetManager,
                "Common/MatDefs/Terrain/Terrain.j3md");
        // *** 1. End

        // *** 2. Start (Alpha Texture)
        materialTerrain.setTexture("Alpha", assetManager.
                loadTexture("Textures/Ex48/redgreenblue.png"));
        // *** 2. End

        // *** 3. Start (Red Texture)
        Texture burlwood = assetManager.loadTexture(
                "Textures/Ex48/burlwood.png");
        burlwood.setWrap(Texture.WrapMode.Repeat);
        materialTerrain.setTexture("Tex1", burlwood);
        materialTerrain.setFloat("Tex1Scale", 64);
        // *** 3. End

        // *** 4. Start (Green Texture)
        Texture craters = assetManager.loadTexture(
                "Textures/Ex48/craters.png");
        craters.setWrap(Texture.WrapMode.Repeat);
        materialTerrain.setTexture("Tex2", craters);
        materialTerrain.setFloat("Tex2Scale", 64);
        // *** 4. End

        // *** 5. Start (Blue Texture)
        Texture road = assetManager.loadTexture(
                "Textures/Ex48/road.png");
        road.setWrap(Texture.WrapMode.Repeat);
        materialTerrain.setTexture("Tex3", road);
        materialTerrain.setFloat("Tex3Scale", 64);
        // *** 5. End

        // *** 6. Start (Height map)
        AbstractHeightMap heightmap = null;
        Texture heightMapImage = assetManager.loadTexture(
                "Textures/Ex48/heightmap.png");
        heightmap = new ImageBasedHeightMap(
                heightMapImage.getImage());
        heightmap.load();
        // *** 6. End

        // *** 7. Start (terrain)
        terrain = new TerrainQuad("terrain",
                129, 513, // patch + 1, height size + 1
                heightmap.getHeightMap()); // float array
        terrain.setMaterial(materialTerrain);
        terrain.setLocalScale(.1f, .1f, .1f);
        float ang = 45*FastMath.DEG_TO_RAD;
        terrain.rotate(ang, 0, ang);
        rootNode.attachChild(terrain);
        cam.setLocation(new Vector3f(0,0,150)); // far away
        // *** 7. End
    }

    @Override
    public void simpleUpdate(float tpf) {
    }

    @Override
    public void simpleRender(RenderManager rm) {
    }
}
Output:
Sep 8, 2014
47. Vector Products
Two multiplications between vectors are dot product and cross product.
The example vectors are on the x-y plane, with vecA being 45 degrees below the +x axis and vecB 45 degrees above the +x axis.
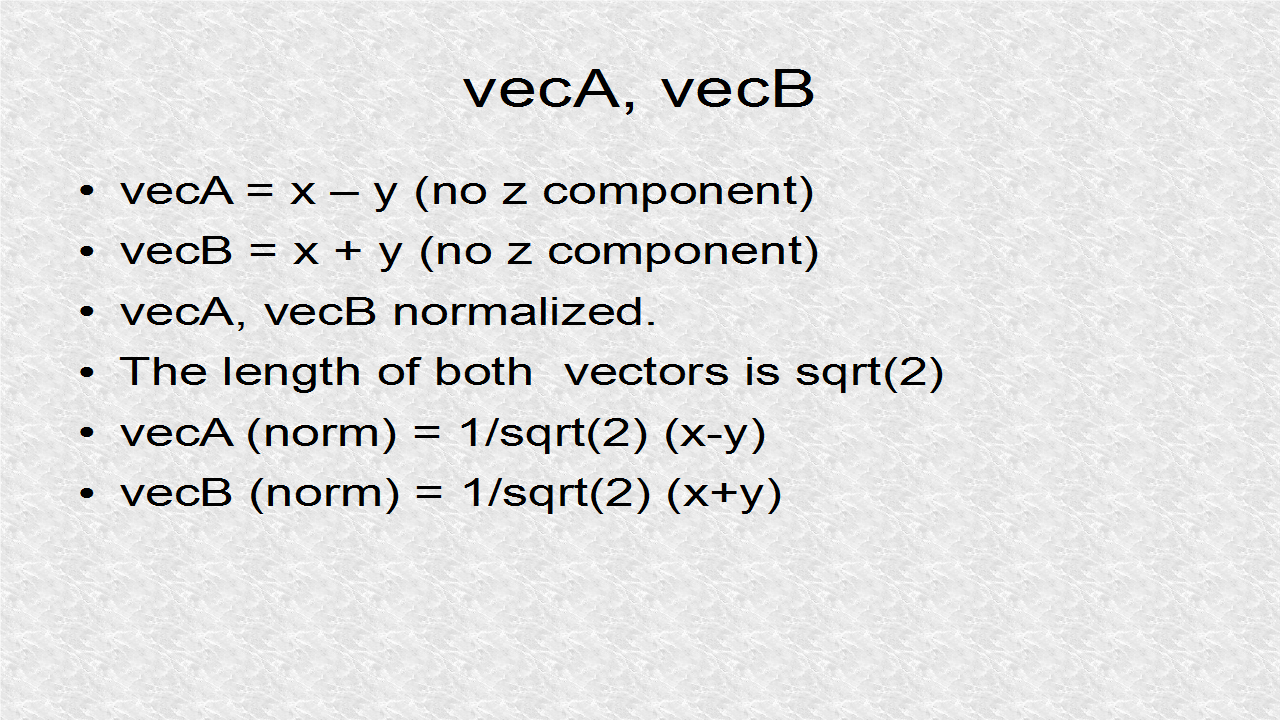
        // *** 1. Start (vectors x-y, x+y, both in xy plane)
        Vector3f vecA = new Vector3f(1,-1,0); // x-y
        Vector3f vecB = new Vector3f(1,1,0); // x+y
        vecA.normalizeLocal(); // normalize them
        vecB.normalizeLocal(); // |vecA|=|vecB|=1
        // *** 1. End
With the dot product, we can find the angle between two vectors.
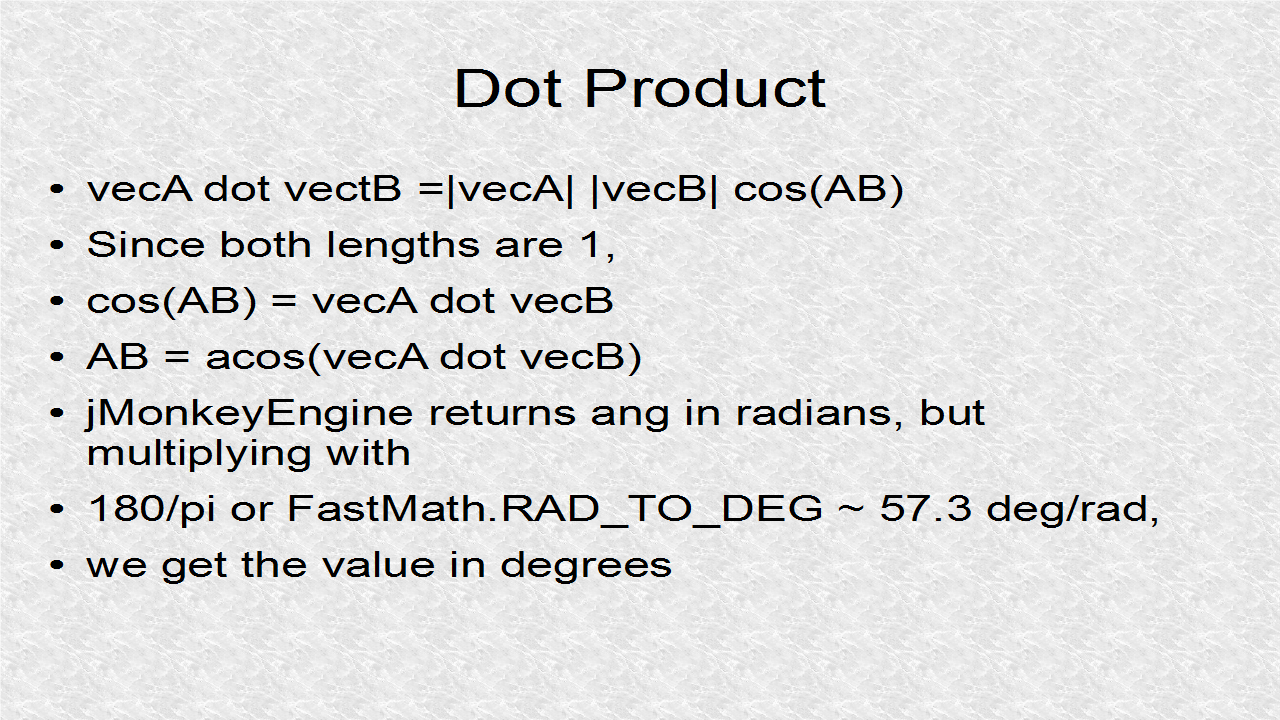
        // *** 2. Start (dot product to find ang)
        float dot = vecA.dot(vecB);
        // vecA.vecB = |vecA| |vecB| cos(AB) = cos(AB)
        float angRad = FastMath.acos(dot);
        float ang = FastMath.RAD_TO_DEG*angRad; // 90 deg
        System.out.println("vecA = " + vecA);
        System.out.println("vecB = " + vecB);
        System.out.println("dot = " + dot);
        System.out.println("ang = " + ang);
        // *** 2. End
With the cross product, we can find the angle between two vectors, as well as the plane normal.
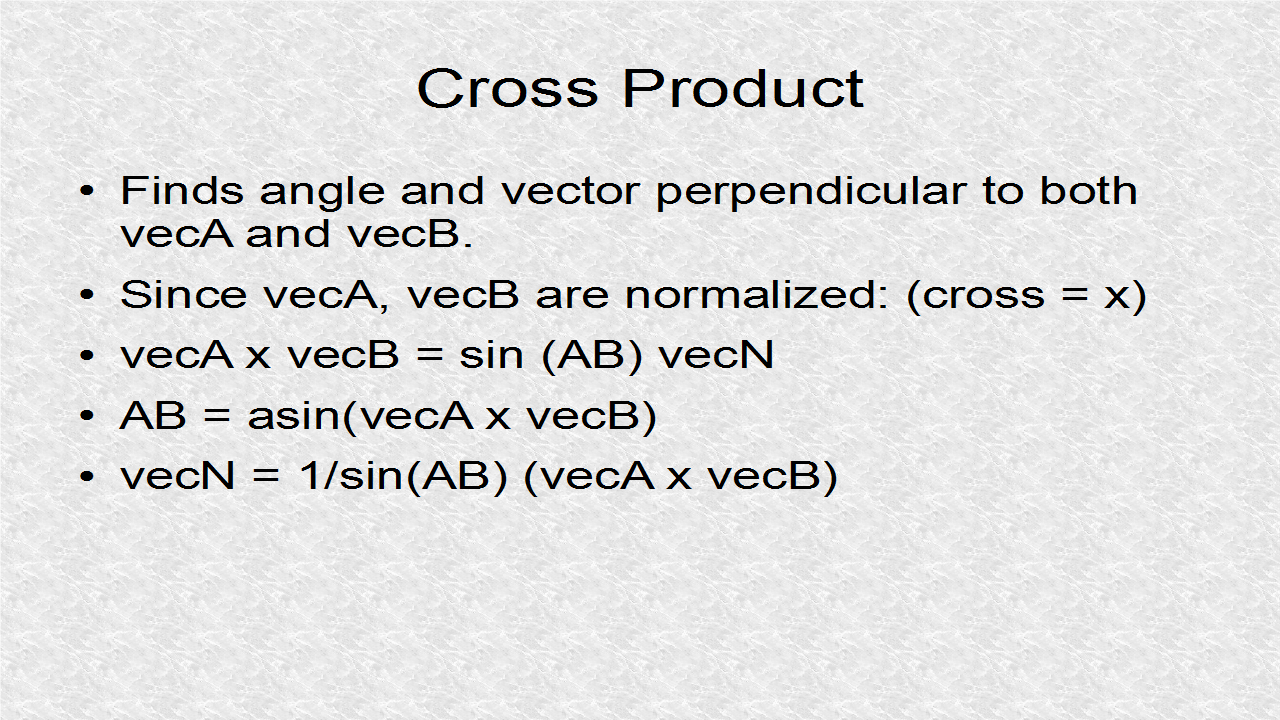
        // *** 3. Start (cross product to find Ang, vecN)
        // vecN in z since vecA,vecB in x,y plane
        // direction of vecN depends on right-hand rule
        Vector3f cross = vecA.cross(vecB);
        // vecA x vecB = |vecA| |vecB| sin(AB) vecN
        // vecA x vecB = sin(AB) vecN
        float len = cross.length();
        float angRad1 = FastMath.asin(len);
        float ang1 = FastMath.RAD_TO_DEG*angRad1; // 90 deg
        Vector3f vecN = new Vector3f(); // z
        vecN = cross.mult(1/len);
        System.out.println("cross = " + cross);
        System.out.println("ang1 = " + ang1);
        System.out.println("vecN = " + vecN);
        // *** 3. End
Three arrows are drawn. Two for the two example vectors, as well as the normal to the plane, formed by the 2 example vectors.
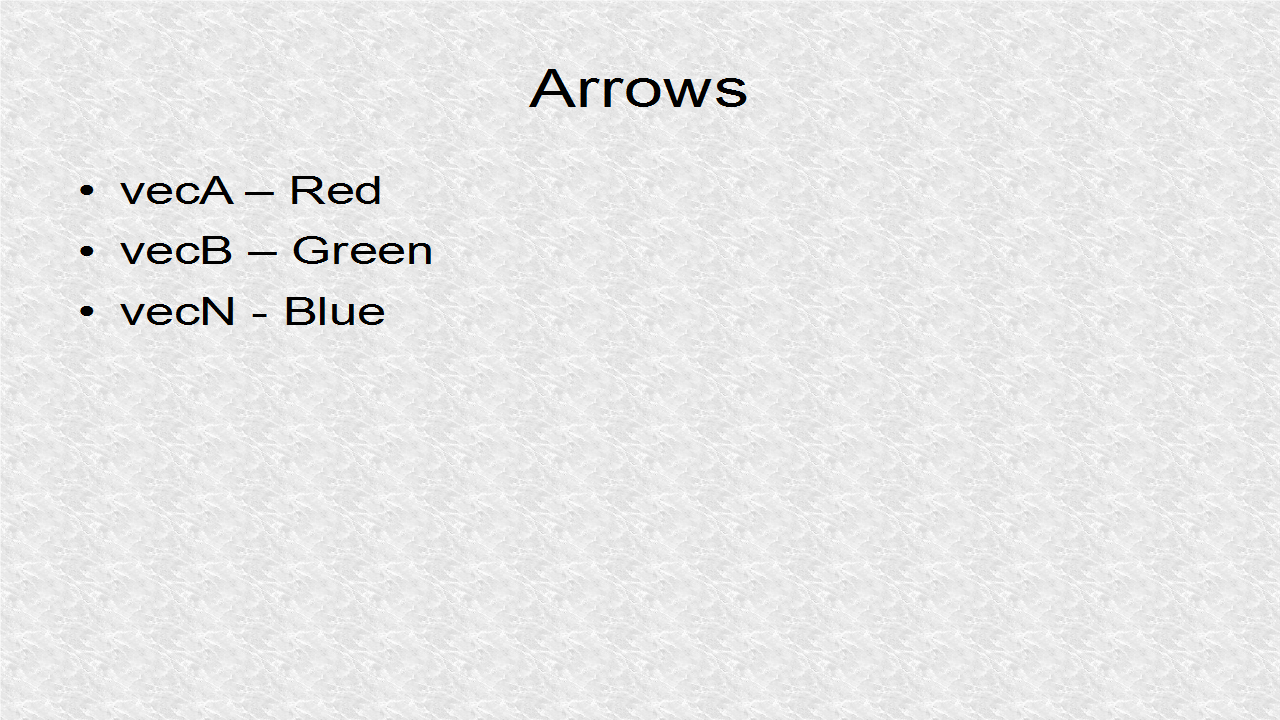
        // *** 4. Starts (arrows for vecA, vecB, vecN)
        Arrow arrowA = new Arrow(vecA);
        arrowA.setLineWidth(4);
        Geometry geoArrowA = new Geometry("geoArrowA",arrowA);
        Material matArrowA = new Material(assetManager,
                "Common/MatDefs/Misc/Unshaded.j3md");
        matArrowA.setColor("Color", ColorRGBA.Red);
        geoArrowA.setMaterial(matArrowA);
        rootNode.attachChild(geoArrowA);
        Arrow arrowB = new Arrow(vecB);
        arrowB.setLineWidth(4);
        Geometry geoArrowB = new Geometry("geoArrowB",arrowB);
        Material matArrowB = new Material(assetManager,
                "Common/MatDefs/Misc/Unshaded.j3md");
        matArrowB.setColor("Color", ColorRGBA.Green);
        geoArrowB.setMaterial(matArrowB);
        rootNode.attachChild(geoArrowB);
        Arrow arrowN = new Arrow(vecN);
        arrowN.setLineWidth(4);
        Geometry geoArrowN = new Geometry("geoArrowN",arrowN);
        Material matArrowN = new Material(assetManager,
                "Common/MatDefs/Misc/Unshaded.j3md");
        matArrowN.setColor("Color", ColorRGBA.Blue);
        geoArrowN.setMaterial(matArrowN);
        rootNode.attachChild(geoArrowN);
        // *** 4. End
// JMonkey47.java

package mygame;

import com.jme3.app.SimpleApplication;
import com.jme3.material.Material;
import com.jme3.math.ColorRGBA;
import com.jme3.math.FastMath;
import com.jme3.math.Vector3f;
import com.jme3.renderer.RenderManager;
import com.jme3.scene.Geometry;
import com.jme3.scene.debug.Arrow;
import com.jme3.system.AppSettings;

public class JMonkey47 extends SimpleApplication {

    public static void main(String[] args) {
        AppSettings settings = new AppSettings(true);
        settings.setFrameRate(60);
        settings.setTitle("Multiplying Vectors !");
        JMonkey47 app = new JMonkey47();
        app.setSettings(settings);
        app.start();
    }

    @Override
    public void simpleInitApp() {
        flyCam.setEnabled(false);
        viewPort.setBackgroundColor(ColorRGBA.White);

        // *** 1. Start (vectors x-y, x+y, both in xy plane)
        Vector3f vecA = new Vector3f(1,-1,0); // x-y
        Vector3f vecB = new Vector3f(1,1,0); // x+y
        vecA.normalizeLocal(); // normalize them
        vecB.normalizeLocal(); // |vecA|=|vecB|=1
        // *** 1. End

        // *** 2. Start (dot product to find ang)
        float dot = vecA.dot(vecB);
        // vecA.vecB = |vecA| |vecB| cos(AB) = cos(AB)
        float angRad = FastMath.acos(dot);
        float ang = FastMath.RAD_TO_DEG*angRad; // 90 deg
        System.out.println("vecA = " + vecA);
        System.out.println("vecB = " + vecB);
        System.out.println("dot = " + dot);
        System.out.println("ang = " + ang);
        // *** 2. End

        // *** 3. Start (cross product to find Ang, vecN)
        // vecN in z since vecA,vecB in x,y plane
        // direction of vecN depends on right-hand rule
        Vector3f cross = vecA.cross(vecB);
        // vecA x vecB = |vecA| |vecB| sin(AB) vecN
        // vecA x vecB = sin(AB) vecN
        float len = cross.length();
        float angRad1 = FastMath.asin(len);
        float ang1 = FastMath.RAD_TO_DEG*angRad1; // 90 deg
        Vector3f vecN = new Vector3f(); // z
        vecN = cross.mult(1/len);
        System.out.println("cross = " + cross);
        System.out.println("ang1 = " + ang1);
        System.out.println("vecN = " + vecN);
        // *** 3. End

        // *** 4. Starts (arrows for vecA, vecB, vecN)
        Arrow arrowA = new Arrow(vecA);
        arrowA.setLineWidth(4);
        Geometry geoArrowA = new Geometry("geoArrowA",arrowA);
        Material matArrowA = new Material(assetManager,
                "Common/MatDefs/Misc/Unshaded.j3md");
        matArrowA.setColor("Color", ColorRGBA.Red);
        geoArrowA.setMaterial(matArrowA);
        rootNode.attachChild(geoArrowA);
        Arrow arrowB = new Arrow(vecB);
        arrowB.setLineWidth(4);
        Geometry geoArrowB = new Geometry("geoArrowB",arrowB);
        Material matArrowB = new Material(assetManager,
                "Common/MatDefs/Misc/Unshaded.j3md");
        matArrowB.setColor("Color", ColorRGBA.Green);
        geoArrowB.setMaterial(matArrowB);
        rootNode.attachChild(geoArrowB);
        Arrow arrowN = new Arrow(vecN);
        arrowN.setLineWidth(4);
        Geometry geoArrowN = new Geometry("geoArrowN",arrowN);
        Material matArrowN = new Material(assetManager,
                "Common/MatDefs/Misc/Unshaded.j3md");
        matArrowN.setColor("Color", ColorRGBA.Blue);
        geoArrowN.setMaterial(matArrowN);
        rootNode.attachChild(geoArrowN);
        // *** 4. End
    }

    @Override
    public void simpleUpdate(float tpf) {
        rootNode.rotate(0,tpf,0);
    }

    @Override
    public void simpleRender(RenderManager rm) {
    }
}
Output:
Sep 7, 2014
46. Translate and Rotate
A rotation needs an axis and an angle. Here we have two rotations on two sphere objects. The two are translated by 3 x-units.
Sphere1 is blue and shown in Wireframe so the individual faces can be seen.
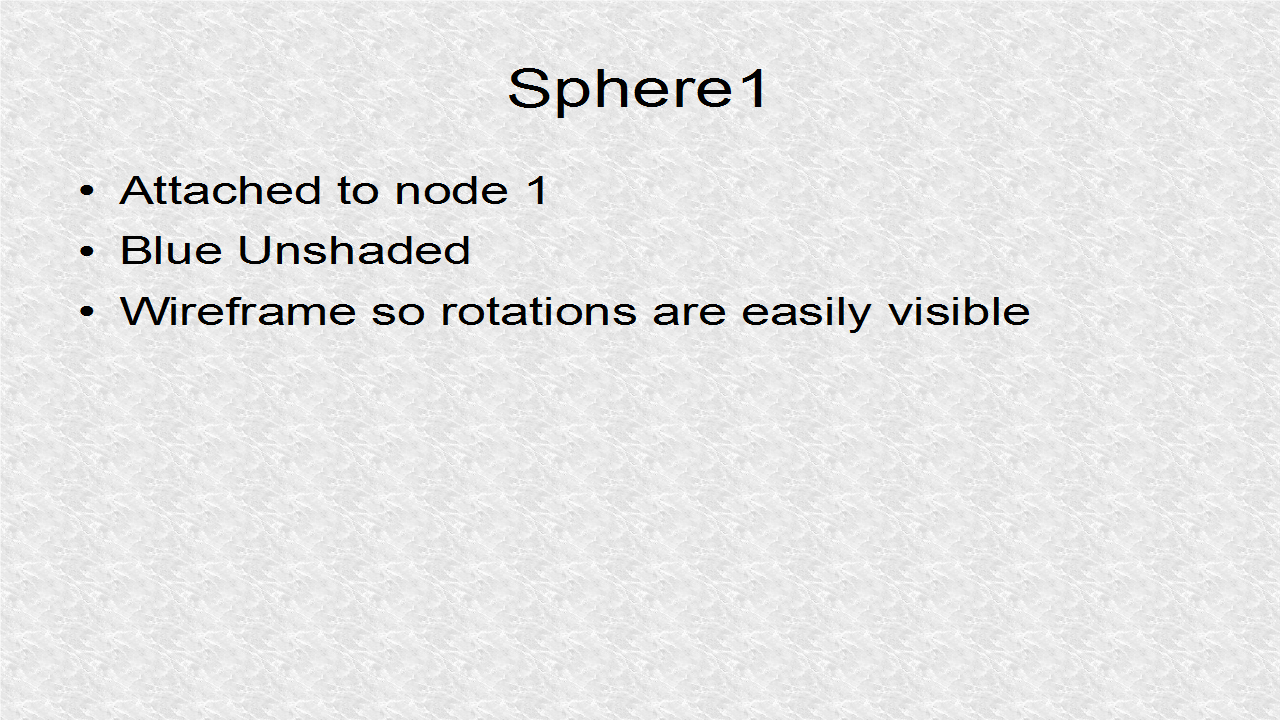
        // *** 1. Start (Sphere1 attached to node1)
        Sphere sph1 = new Sphere(8, 16, 1);
        Geometry geom1 = new Geometry("Sphere1", sph1);
        Material mat1 = new Material(assetManager,
                "Common/MatDefs/Misc/Unshaded.j3md");
        mat1.setColor("Color", ColorRGBA.Blue);
        mat1.getAdditionalRenderState().setWireframe(true);
        geom1.setMaterial(mat1);
        node1.attachChild(geom1);
        // *** 1. End
Sphere2 is green and also shown in Wireframe.
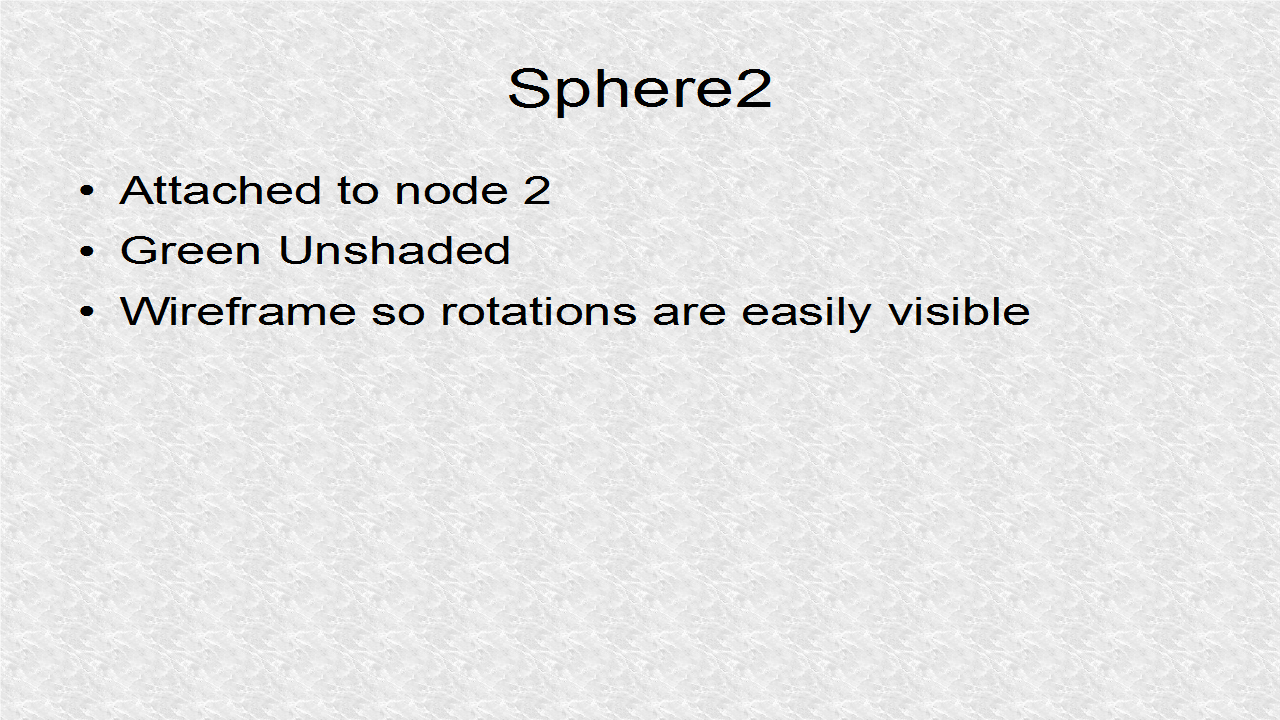
        // *** 2. Start (Sphere2 attached to node2)
        Sphere sph2 = new Sphere(8, 16, 1);
        Geometry geom2 = new Geometry("Sphere2", sph2);
        Material mat2 = new Material(assetManager,
                "Common/MatDefs/Misc/Unshaded.j3md");
        mat2.setColor("Color", ColorRGBA.Green);
        mat2.getAdditionalRenderState().setWireframe(true);
        geom2.setMaterial(mat2);
        node2.attachChild(geom2);
        // *** 2. End
axis1 is a red arrow at 45 degrees to +x axis in xy plane. Rotation for sphere1 is based on this axis.
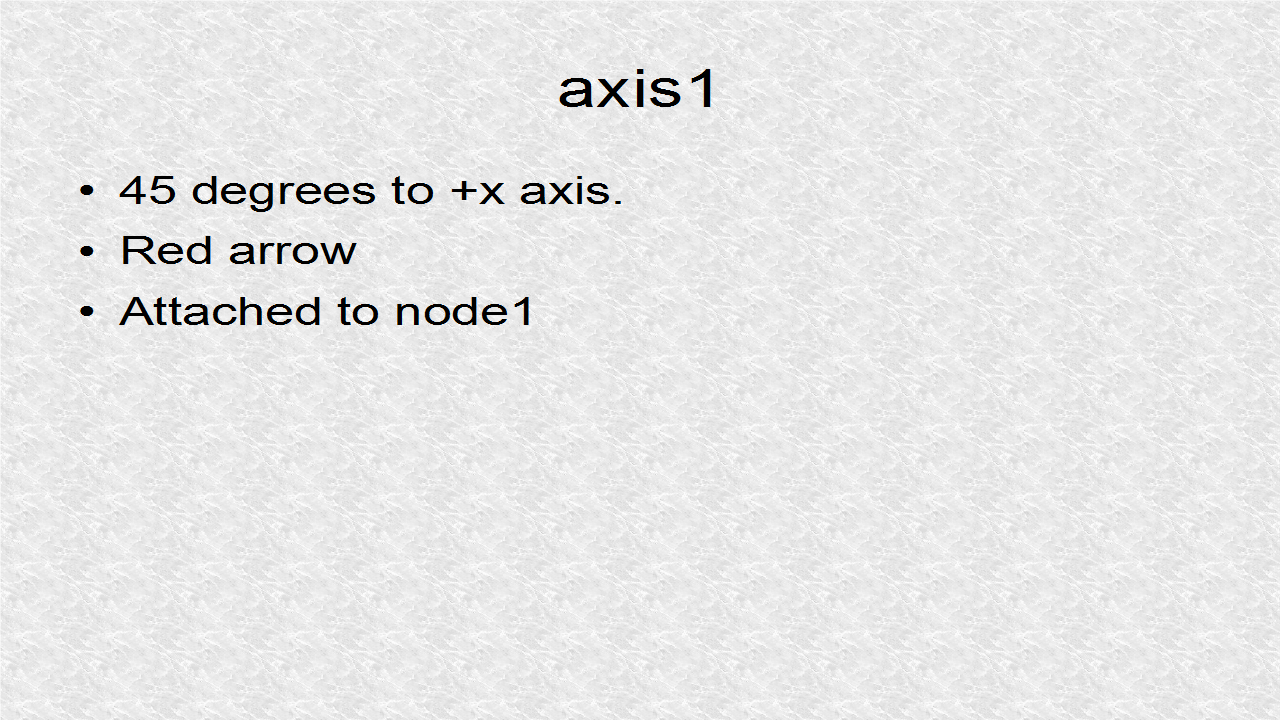
        // *** 3. Start (Arrow1,+45 deg to +x axis, node1)
        Vector3f axis1 = new Vector3f(2f,2f,0f);
        Arrow arrow1 = new Arrow(axis1);
        Geometry geoArrow1 = new Geometry("geoArrow1",arrow1);
        Material matArrow1 = new Material(assetManager,
                "Common/MatDefs/Misc/Unshaded.j3md");
        matArrow1.setColor("Color", ColorRGBA.Red);
        geoArrow1.setMaterial(matArrow1);
        node1.attachChild(geoArrow1);
        // *** 3. End
axis2 is -45 degree to +x axis in xy-plane. It will be used for axis of rotation for sphere2.
        // *** 4. Start (Arrow2,-45 deg to +x axis, node2)
        Vector3f axis2 = new Vector3f(2f,-2f,0f);
        Arrow arrow2 = new Arrow(axis2);
        Geometry geoArrow2 = new Geometry("geoArrow2",arrow2);
        Material matArrow2 = new Material(assetManager,
                "Common/MatDefs/Misc/Unshaded.j3md");
        matArrow2.setColor("Color", ColorRGBA.Red);
        geoArrow2.setMaterial(matArrow2);
        node2.attachChild(geoArrow2);
        // *** 4. End
node2 is translated, so arrow2 and sphere2, can be clearly seen, so they are not overlapping.
        // *** 5. Start (Move node2 by 3 units right)
        node2.setLocalTranslation(3,0,0);
        // *** 5. End
Understanding Quaternion math is not necessary in using them. We use fromAngleAxis() and give the angle and axis.
        // *** 6. Start (Quaternions)
        quat1 = new Quaternion();
        quat1.fromAngleAxis(FastMath.DEG_TO_RAD, axis1);
        quat2 = new Quaternion();
        quat2.fromAngleAxis(FastMath.DEG_TO_RAD, axis2);
        // *** 6. End
In the simpleUpdate(), we rotate by 1 degree per frame for of two spheres.
        // *** 7. Start (Rotations (1 deg/frame) using Quaternions)
        node1.rotate(quat1);
        //node1.rotate(FastMath.DEG_TO_RAD,
        //FastMath.DEG_TO_RAD,0); // or this
        node2.rotate(quat2);
        //node2.rotate(FastMath.DEG_TO_RAD,
        //-FastMath.DEG_TO_RAD,0); // or this
        // *** 7. End
// JMonkey46.java

package mygame;

import com.jme3.app.SimpleApplication;
import com.jme3.material.Material;
import com.jme3.math.ColorRGBA;
import com.jme3.math.FastMath;
import com.jme3.math.Quaternion;
import com.jme3.math.Vector3f;
import com.jme3.renderer.RenderManager;
import com.jme3.scene.Geometry;
import com.jme3.scene.Node;
import com.jme3.scene.debug.Arrow;
import com.jme3.scene.shape.Sphere;

public class JMonkey46 extends SimpleApplication {
    public static void main(String[] args) {
        JMonkey46 app = new JMonkey46();
        app.start();
    }

    Quaternion quat1,quat2;
    Node node1,node2;

    @Override
    public void simpleInitApp() {
        viewPort.setBackgroundColor(ColorRGBA.White);
        flyCam.setEnabled(false);
        node1 = new Node("node1");
        node2 = new Node("node2");

        // *** 1. Start (Sphere1 attached to node1)
        Sphere sph1 = new Sphere(8, 16, 1);
        Geometry geom1 = new Geometry("Sphere1", sph1);
        Material mat1 = new Material(assetManager,
                "Common/MatDefs/Misc/Unshaded.j3md");
        mat1.setColor("Color", ColorRGBA.Blue);
        mat1.getAdditionalRenderState().setWireframe(true);
        geom1.setMaterial(mat1);
        node1.attachChild(geom1);
        // *** 1. End

        // *** 2. Start (Sphere2 attached to node2)
        Sphere sph2 = new Sphere(8, 16, 1);
        Geometry geom2 = new Geometry("Sphere2", sph2);
        Material mat2 = new Material(assetManager,
                "Common/MatDefs/Misc/Unshaded.j3md");
        mat2.setColor("Color", ColorRGBA.Green);
        mat2.getAdditionalRenderState().setWireframe(true);
        geom2.setMaterial(mat2);
        node2.attachChild(geom2);
        // *** 2. End

        // *** 3. Start (Arrow1,+45 deg to +x axis, node1)
        Vector3f axis1 = new Vector3f(2f,2f,0f);
        Arrow arrow1 = new Arrow(axis1);
        Geometry geoArrow1 = new Geometry("geoArrow1",arrow1);
        Material matArrow1 = new Material(assetManager,
                "Common/MatDefs/Misc/Unshaded.j3md");
        matArrow1.setColor("Color", ColorRGBA.Red);
        geoArrow1.setMaterial(matArrow1);
        node1.attachChild(geoArrow1);
        // *** 3. End

        // *** 4. Start (Arrow2,-45 deg to +x axis, node2)
        Vector3f axis2 = new Vector3f(2f,-2f,0f);
        Arrow arrow2 = new Arrow(axis2);
        Geometry geoArrow2 = new Geometry("geoArrow2",arrow2);
        Material matArrow2 = new Material(assetManager,
                "Common/MatDefs/Misc/Unshaded.j3md");
        matArrow2.setColor("Color", ColorRGBA.Red);
        geoArrow2.setMaterial(matArrow2);
        node2.attachChild(geoArrow2);
        // *** 4. End

        // *** 5. Start (Move node2 by 3 units right)
        node2.setLocalTranslation(3,0,0);
        // *** 5. End

        rootNode.attachChild(node1);
        rootNode.attachChild(node2);

        // *** 6. Start (Quaternions)
        quat1 = new Quaternion();
        quat1.fromAngleAxis(FastMath.DEG_TO_RAD, axis1);
        quat2 = new Quaternion();
        quat2.fromAngleAxis(FastMath.DEG_TO_RAD, axis2);
        // *** 6. End
    }

    @Override
    public void simpleUpdate(float tpf) {
        // *** 7. Start (Rotations (1 deg/frame) using Quaternions)
        node1.rotate(quat1);
        //node1.rotate(FastMath.DEG_TO_RAD,
        //FastMath.DEG_TO_RAD,0); // or this
        node2.rotate(quat2);
        //node2.rotate(FastMath.DEG_TO_RAD,
        //-FastMath.DEG_TO_RAD,0); // or this
        // *** 7. End
    }

    @Override
    public void simpleRender(RenderManager rm) {
        //TODO: add render code
    }
}
Output:
Sep 6, 2014
45. Scale
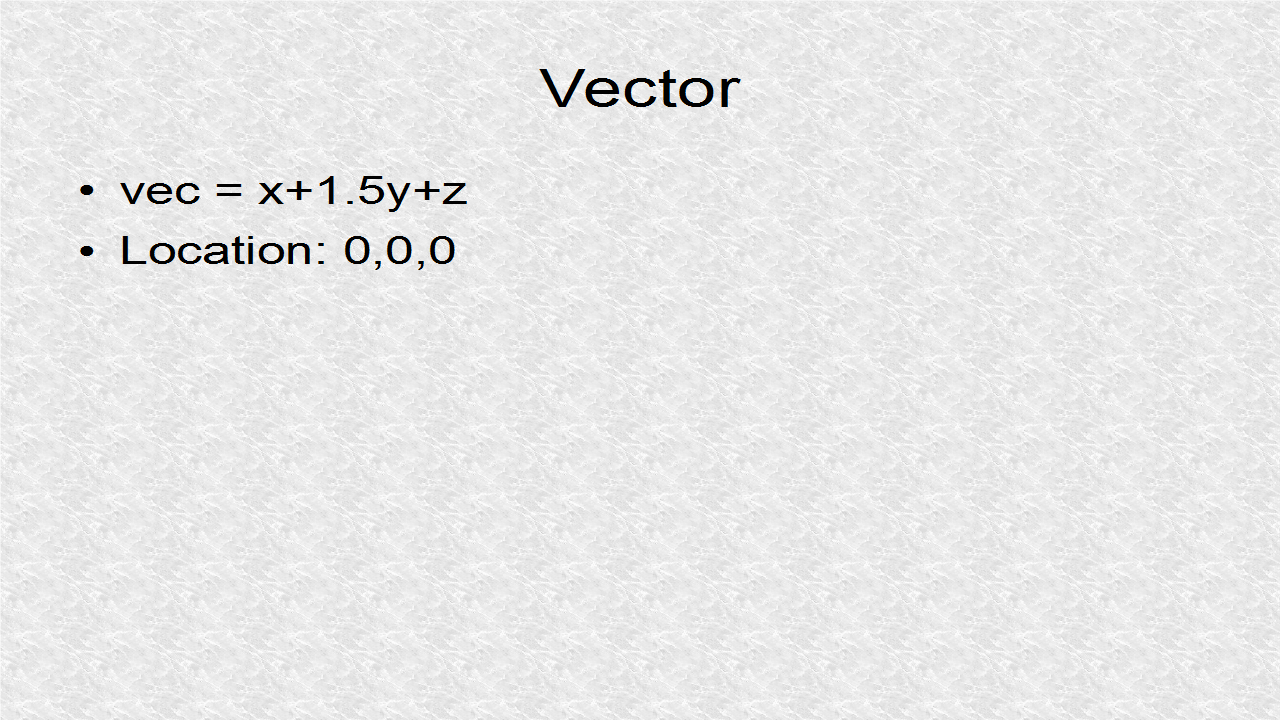
A vector multiplied by a positive number results in vector in the same direction.
We use this example vector, with origin located at 0,0,0.
        // *** 1. Start (vec=x+1.5y+2z) (Blue)
        Vector3f vec = new Vector3f(1.0f,1.5f,2.0f);
        Arrow arrow = new Arrow(vec);
        arrow.setLineWidth(3);
        Geometry geoArrow = new Geometry("arrow",arrow);
        geoArrow.setMaterial(mat);
        rootNode.attachChild(geoArrow);
        // *** 1. End
We can use math functions to write the magnitude, and we can multiply the vector by the inverse of this number.
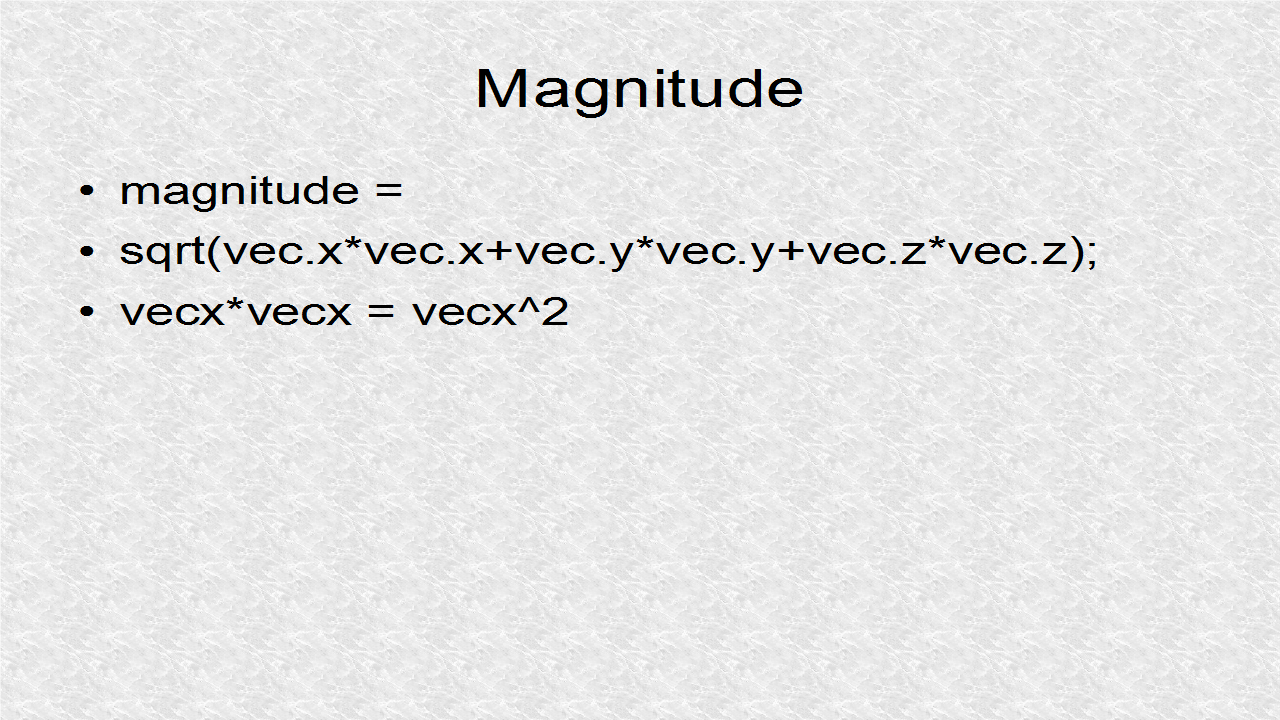
        // *** 2. Start (normalizing vector using math)
        float magnitude = FastMath.sqrt(
                vec.x*vec.x+vec.y*vec.y+vec.z*vec.z);
        Vector3f normMath = vec.mult(1f/magnitude);
        System.out.println("normMath = " + normMath);
        // *** 2. End
We could also normalize with Vector3f methods.
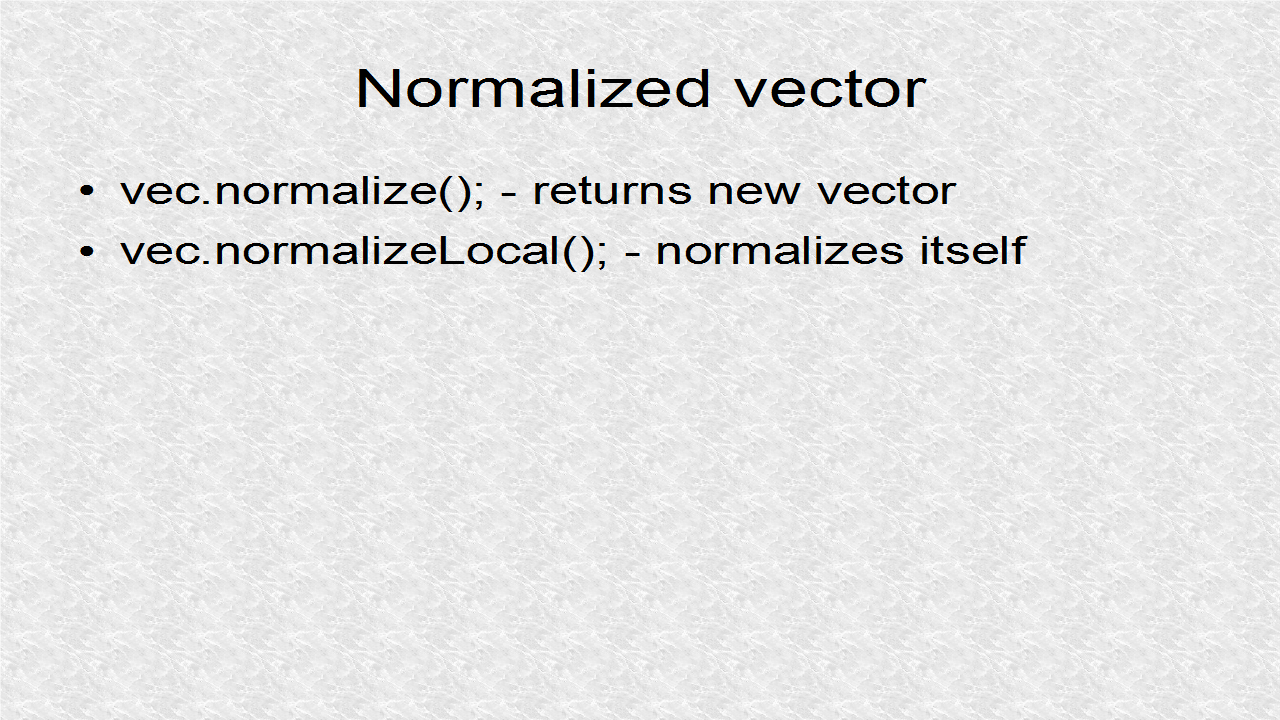
        // *** 3. Start (normalized vecotor) (Red)
        Vector3f vecNorm = vec.normalize();
        vec.normalizeLocal(); // In-place normalization
        System.out.print("vec = " + vec + ", vecNorm = " + vecNorm);
        Arrow arrow1 = new Arrow(vec);
        arrow1.setLineWidth(3);
        Geometry geoArrow1 = new Geometry("arrowNorm",arrow1);
        geoArrow1.setMaterial(mat1);
        rootNode.attachChild(geoArrow1);
        // *** 3. End
We create an opposite direction vector from the normalized vector.
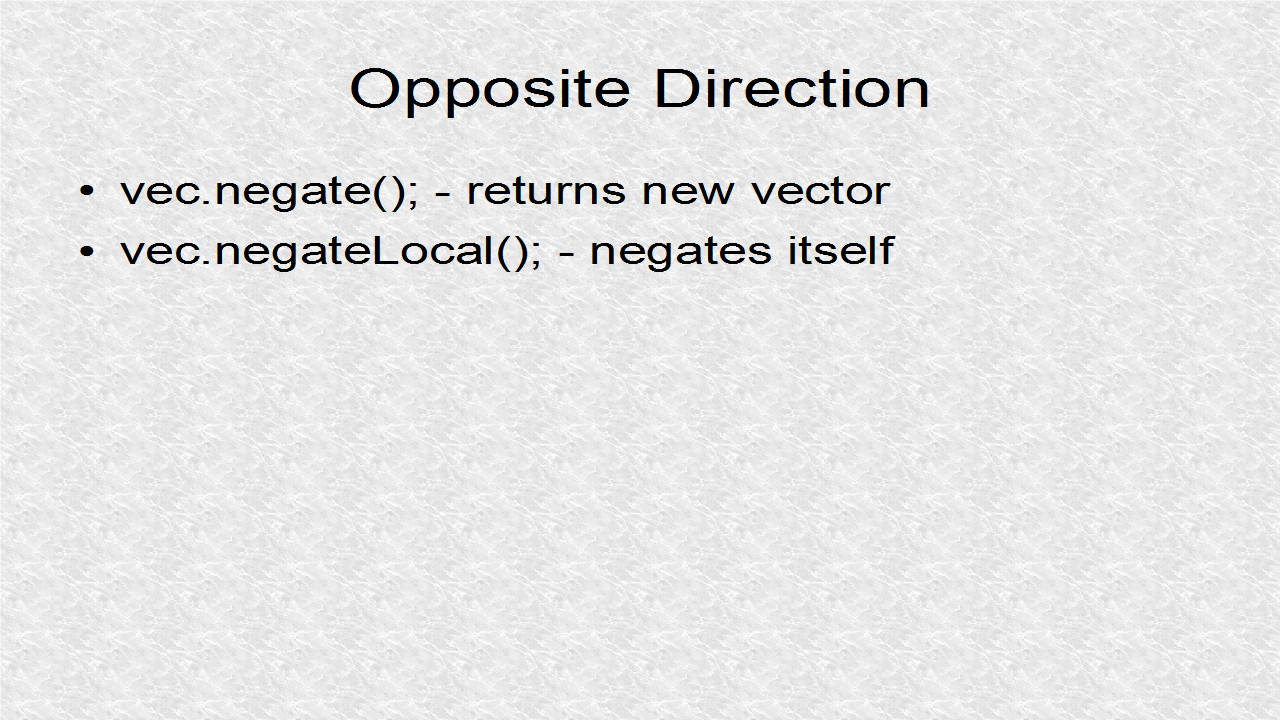
        // *** 4. Start (Opposite) (Green)
        vec.negateLocal(); // In place negation
        Arrow arrow2 = new Arrow(vec);
        arrow2.setLineWidth(3);
        Geometry geoArrow2 = new Geometry("arrowNormNeg",arrow2);
        geoArrow2.setMaterial(mat2);
        rootNode.attachChild(geoArrow2);
        // *** 4. End
The three components (x,y,z) are shown. For the y and z arrows, we translate in either x or both x and y.
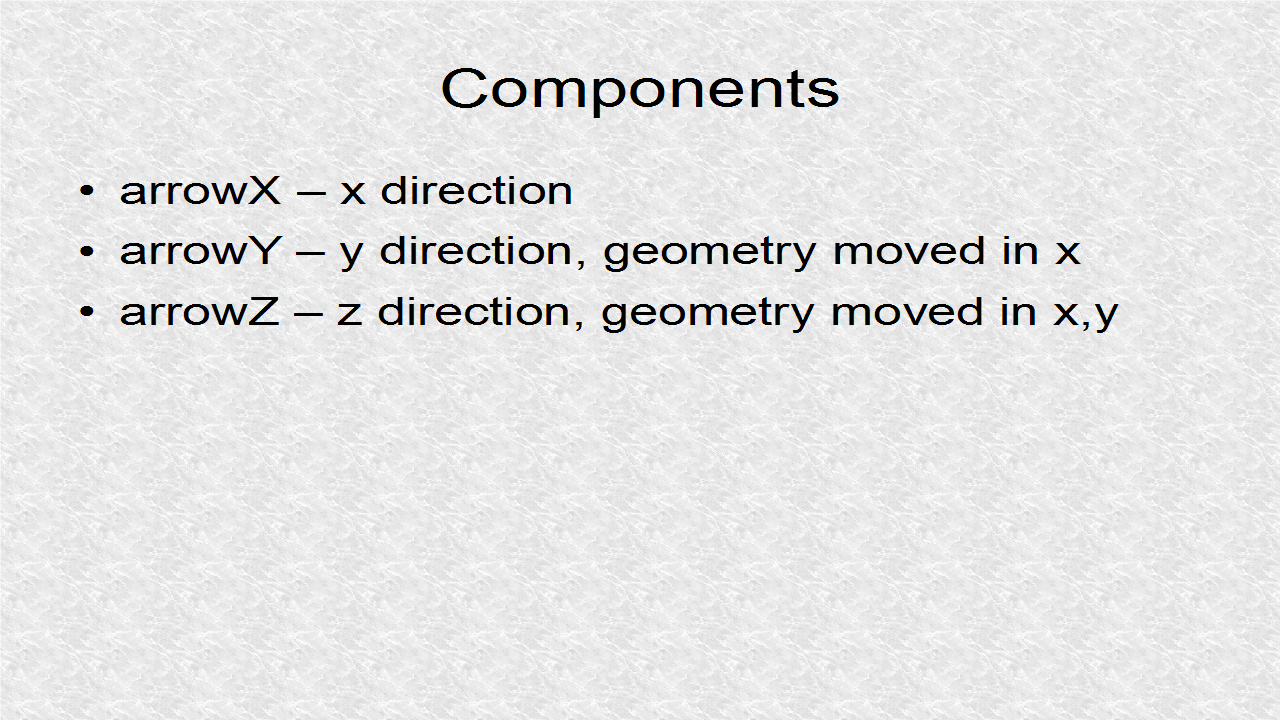
        // *** 5. Start (Components) (Yellow)
        Vector3f vecCopy = new Vector3f(1.0f,1.5f,2.0f);
        Vector3f vecX = new Vector3f(vecCopy.x,0,0); // only x
        Arrow arrowX = new Arrow(vecX);
        arrowX.setLineWidth(2);
        Geometry geoArrowX = new Geometry("arrowX",arrowX);
        geoArrowX.setMaterial(mat3);
        rootNode.attachChild(geoArrowX);
        Vector3f vecY = new Vector3f(0,vecCopy.y,0); // only y
        Arrow arrowY = new Arrow(vecY);
        arrowY.setLineWidth(3);
        Geometry geoArrowY = new Geometry("arrowY",arrowY);
        geoArrowY.setLocalTranslation(vecX); // displaced in x
        geoArrowY.setMaterial(mat3);
        rootNode.attachChild(geoArrowY);
        Arrow arrowZ = new Arrow(new Vector3f(0,0,vecCopy.z));
        arrowZ.setLineWidth(4);
        Geometry geoArrowZ = new Geometry("arrowZ",arrowZ);
        geoArrowZ.setLocalTranslation(
                new Vector3f(
                vecCopy.x,vecCopy.y,0)); // displaced in x,y
        geoArrowZ.setMaterial(mat3);
        rootNode.attachChild(geoArrowZ);
        // *** 5. End
// JMonkey45.java

package mygame;

import com.jme3.app.SimpleApplication;
import com.jme3.material.Material;
import com.jme3.math.ColorRGBA;
import com.jme3.math.FastMath;
import com.jme3.math.Vector3f;
import com.jme3.renderer.RenderManager;
import com.jme3.scene.Geometry;
import com.jme3.scene.debug.Arrow;

public class JMonkey45 extends SimpleApplication {

    public static void main(String[] args) {
        JMonkey45 app = new JMonkey45();
        app.start();
    }

    @Override
    public void simpleInitApp() {
        viewPort.setBackgroundColor(ColorRGBA.LightGray);
        flyCam.setEnabled(false);
        Material mat = new Material(assetManager,
                "Common/MatDefs/Misc/Unshaded.j3md");
        mat.setColor("Color", ColorRGBA.Blue);
        Material mat1 = new Material(assetManager,
                "Common/MatDefs/Misc/Unshaded.j3md");
        mat1.setColor("Color", ColorRGBA.Red);
        Material mat2 = new Material(assetManager,
                "Common/MatDefs/Misc/Unshaded.j3md");
        mat2.setColor("Color", ColorRGBA.Green);
        Material mat3 = new Material(assetManager,
                "Common/MatDefs/Misc/Unshaded.j3md");
        mat3.setColor("Color", ColorRGBA.Yellow);

        // *** 1. Start (vec=x+1.5y+2z) (Blue)
        Vector3f vec = new Vector3f(1.0f,1.5f,2.0f);
        Arrow arrow = new Arrow(vec);
        arrow.setLineWidth(3);
        Geometry geoArrow = new Geometry("arrow",arrow);
        geoArrow.setMaterial(mat);
        rootNode.attachChild(geoArrow);
        // *** 1. End

        // *** 2. Start (normalizing vector using math)
        float magnitude = FastMath.sqrt(
                vec.x*vec.x+vec.y*vec.y+vec.z*vec.z);
        Vector3f normMath = vec.mult(1f/magnitude);
        System.out.println("normMath = " + normMath);
        // *** 2. End

        // *** 3. Start (normalized vecotor) (Red)
        Vector3f vecNorm = vec.normalize();
        vec.normalizeLocal(); // In-place normalization
        System.out.print("vec = " + vec + ", vecNorm = " + vecNorm);
        Arrow arrow1 = new Arrow(vec);
        arrow1.setLineWidth(3);
        Geometry geoArrow1 = new Geometry("arrowNorm",arrow1);
        geoArrow1.setMaterial(mat1);
        rootNode.attachChild(geoArrow1);
        // *** 3. End

        // *** 4. Start (Opposite) (Green)
        vec.negateLocal(); // In place negation
        Arrow arrow2 = new Arrow(vec);
        arrow2.setLineWidth(3);
        Geometry geoArrow2 = new Geometry("arrowNormNeg",arrow2);
        geoArrow2.setMaterial(mat2);
        rootNode.attachChild(geoArrow2);
        // *** 4. End

        // *** 5. Start (Components) (Yellow)
        Vector3f vecCopy = new Vector3f(1.0f,1.5f,2.0f);
        Vector3f vecX = new Vector3f(vecCopy.x,0,0); // only x
        Arrow arrowX = new Arrow(vecX);
        arrowX.setLineWidth(2);
        Geometry geoArrowX = new Geometry("arrowX",arrowX);
        geoArrowX.setMaterial(mat3);
        rootNode.attachChild(geoArrowX);
        Vector3f vecY = new Vector3f(0,vecCopy.y,0); // only y
        Arrow arrowY = new Arrow(vecY);
        arrowY.setLineWidth(3);
        Geometry geoArrowY = new Geometry("arrowY",arrowY);
        geoArrowY.setLocalTranslation(vecX); // displaced in x
        geoArrowY.setMaterial(mat3);
        rootNode.attachChild(geoArrowY);
        Arrow arrowZ = new Arrow(new Vector3f(0,0,vecCopy.z));
        arrowZ.setLineWidth(4);
        Geometry geoArrowZ = new Geometry("arrowZ",arrowZ);
        geoArrowZ.setLocalTranslation(
                new Vector3f(
                vecCopy.x,vecCopy.y,0)); // displaced in x,y
        geoArrowZ.setMaterial(mat3);
        rootNode.attachChild(geoArrowZ);
        // *** 5. End
    }

    @Override
    public void simpleUpdate(float tpf) {
        rootNode.rotate(tpf,tpf,tpf);
     }

    @Override
    public void simpleRender(RenderManager rm) {
    }
}
Output:
Subscribe to:
Posts (Atom)